Part 2 - Deploying Your Store
Before following Part 2, you would have completed customizing and able to preview your store following the steps in Part 1 - Customize Your Store.
In Part 2 of this guide, you will deploy your store online using cloud platform like Railway - akin to you putting your shop on a rented space for your customers to access. This is where you’ll add a payment card, and where you will need to manually complete the 3 out of the 4 manual steps highlighted here
Fill in where the store should live
- Go back to the store launcher and click Tab 2. Deploy store.
- Environment - choose Staging / test for your first run. This is practice mode.
- Hosting platform - choose Railway.
- Store DNS hostname - the address you want. If you don’t own one yet, put anything sensible; you’ll be offered a free Railway address later.
- Merchant and Store identifier - already filled in, because you came from your store page. Just check they look right.
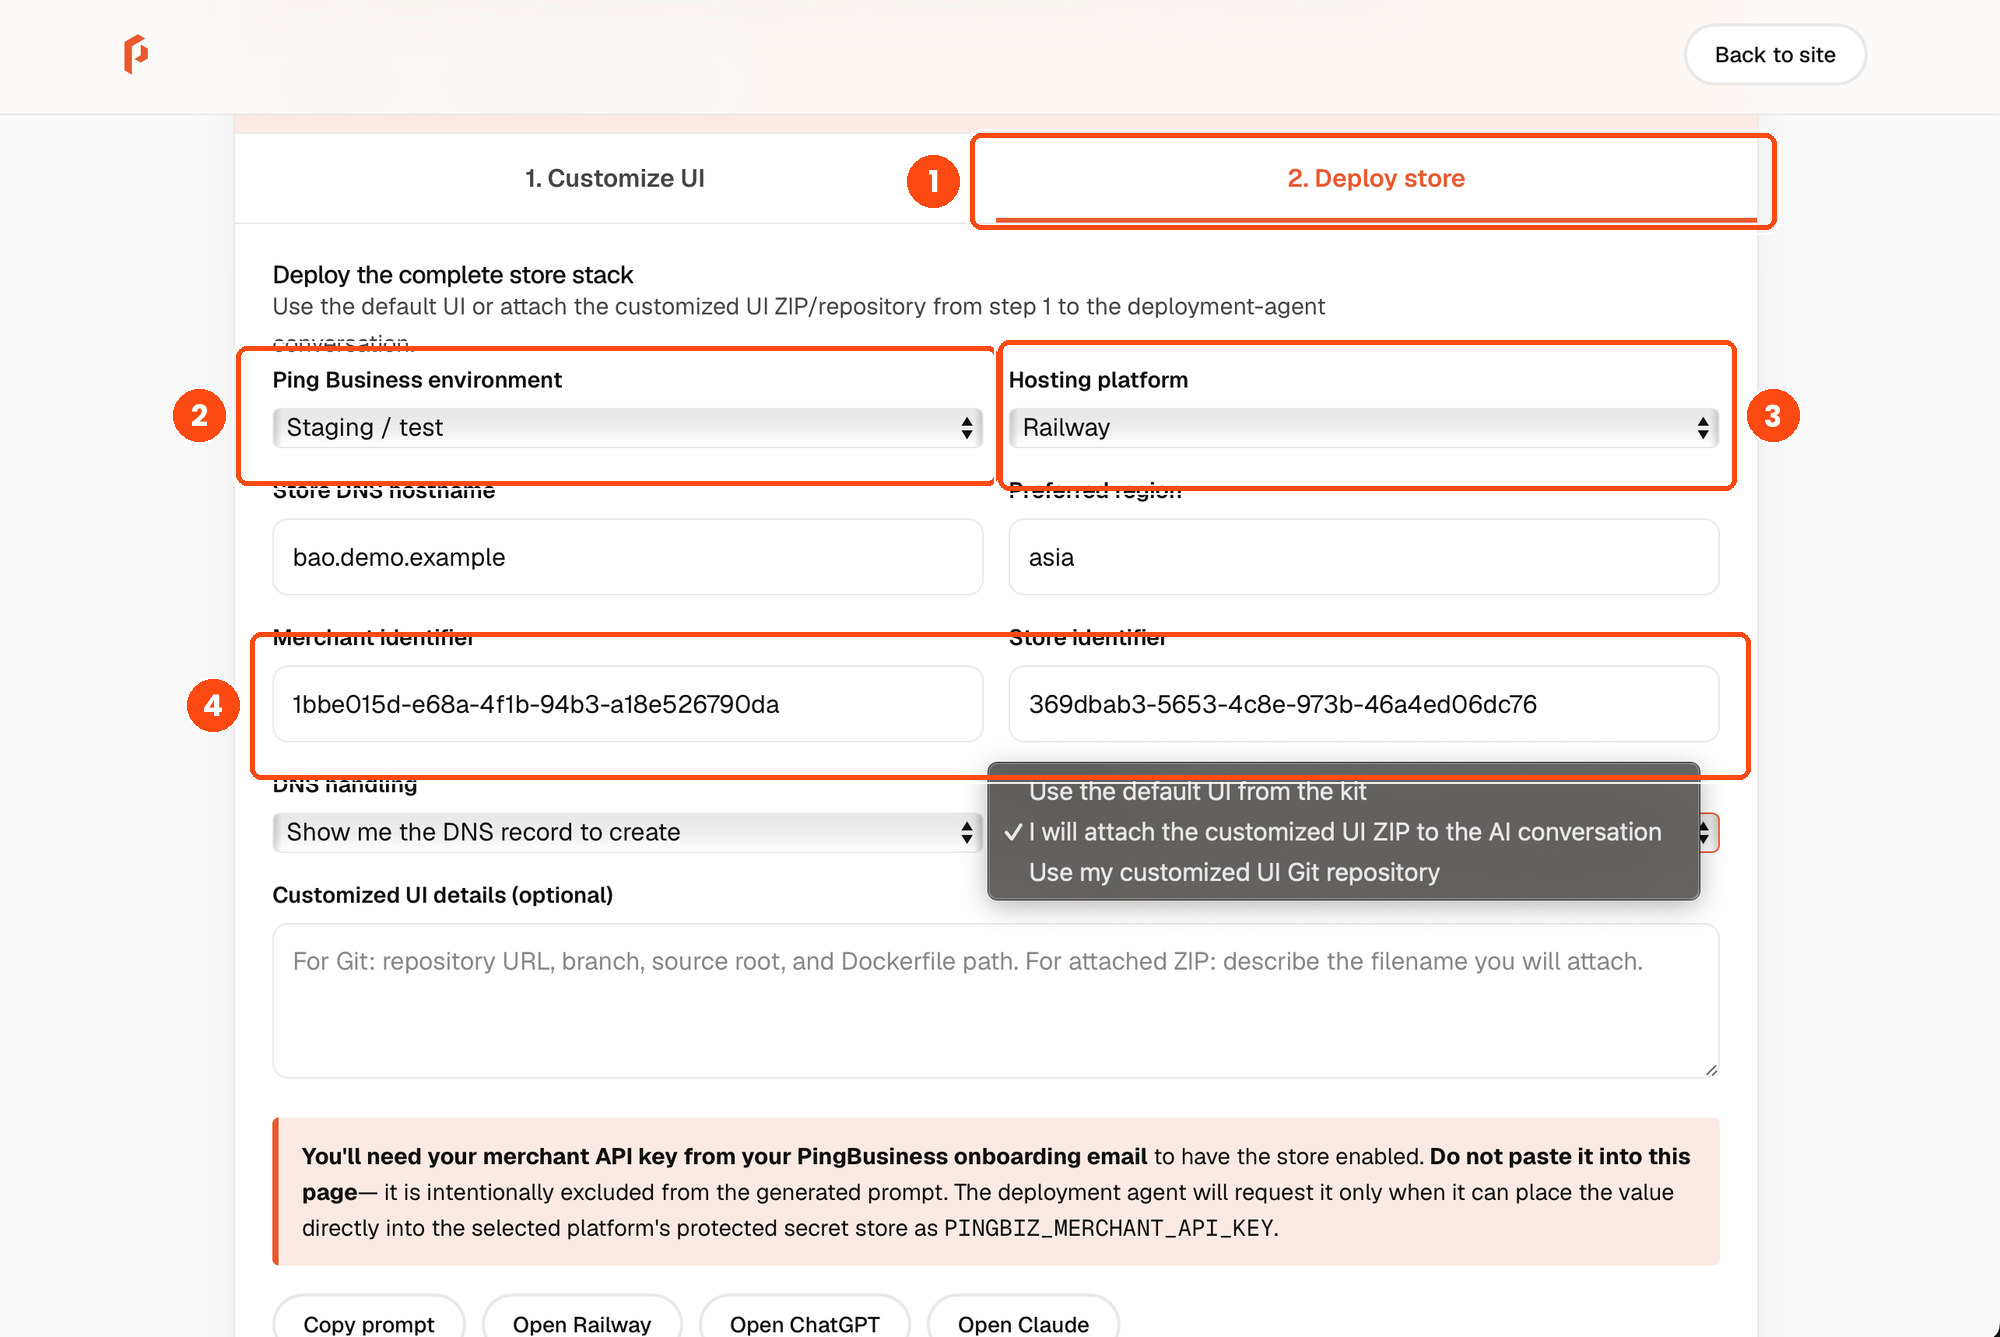
(1) The Deploy store tab (2) practice or real (3) Railway (4) Pre-filled for you
Hand over the deployment instructions
Click Copy prompt and paste the prompt into Cursor - using the same conversation as Part 1 is the ideal option, as the workflow still has your shop design.
Send the prompt.
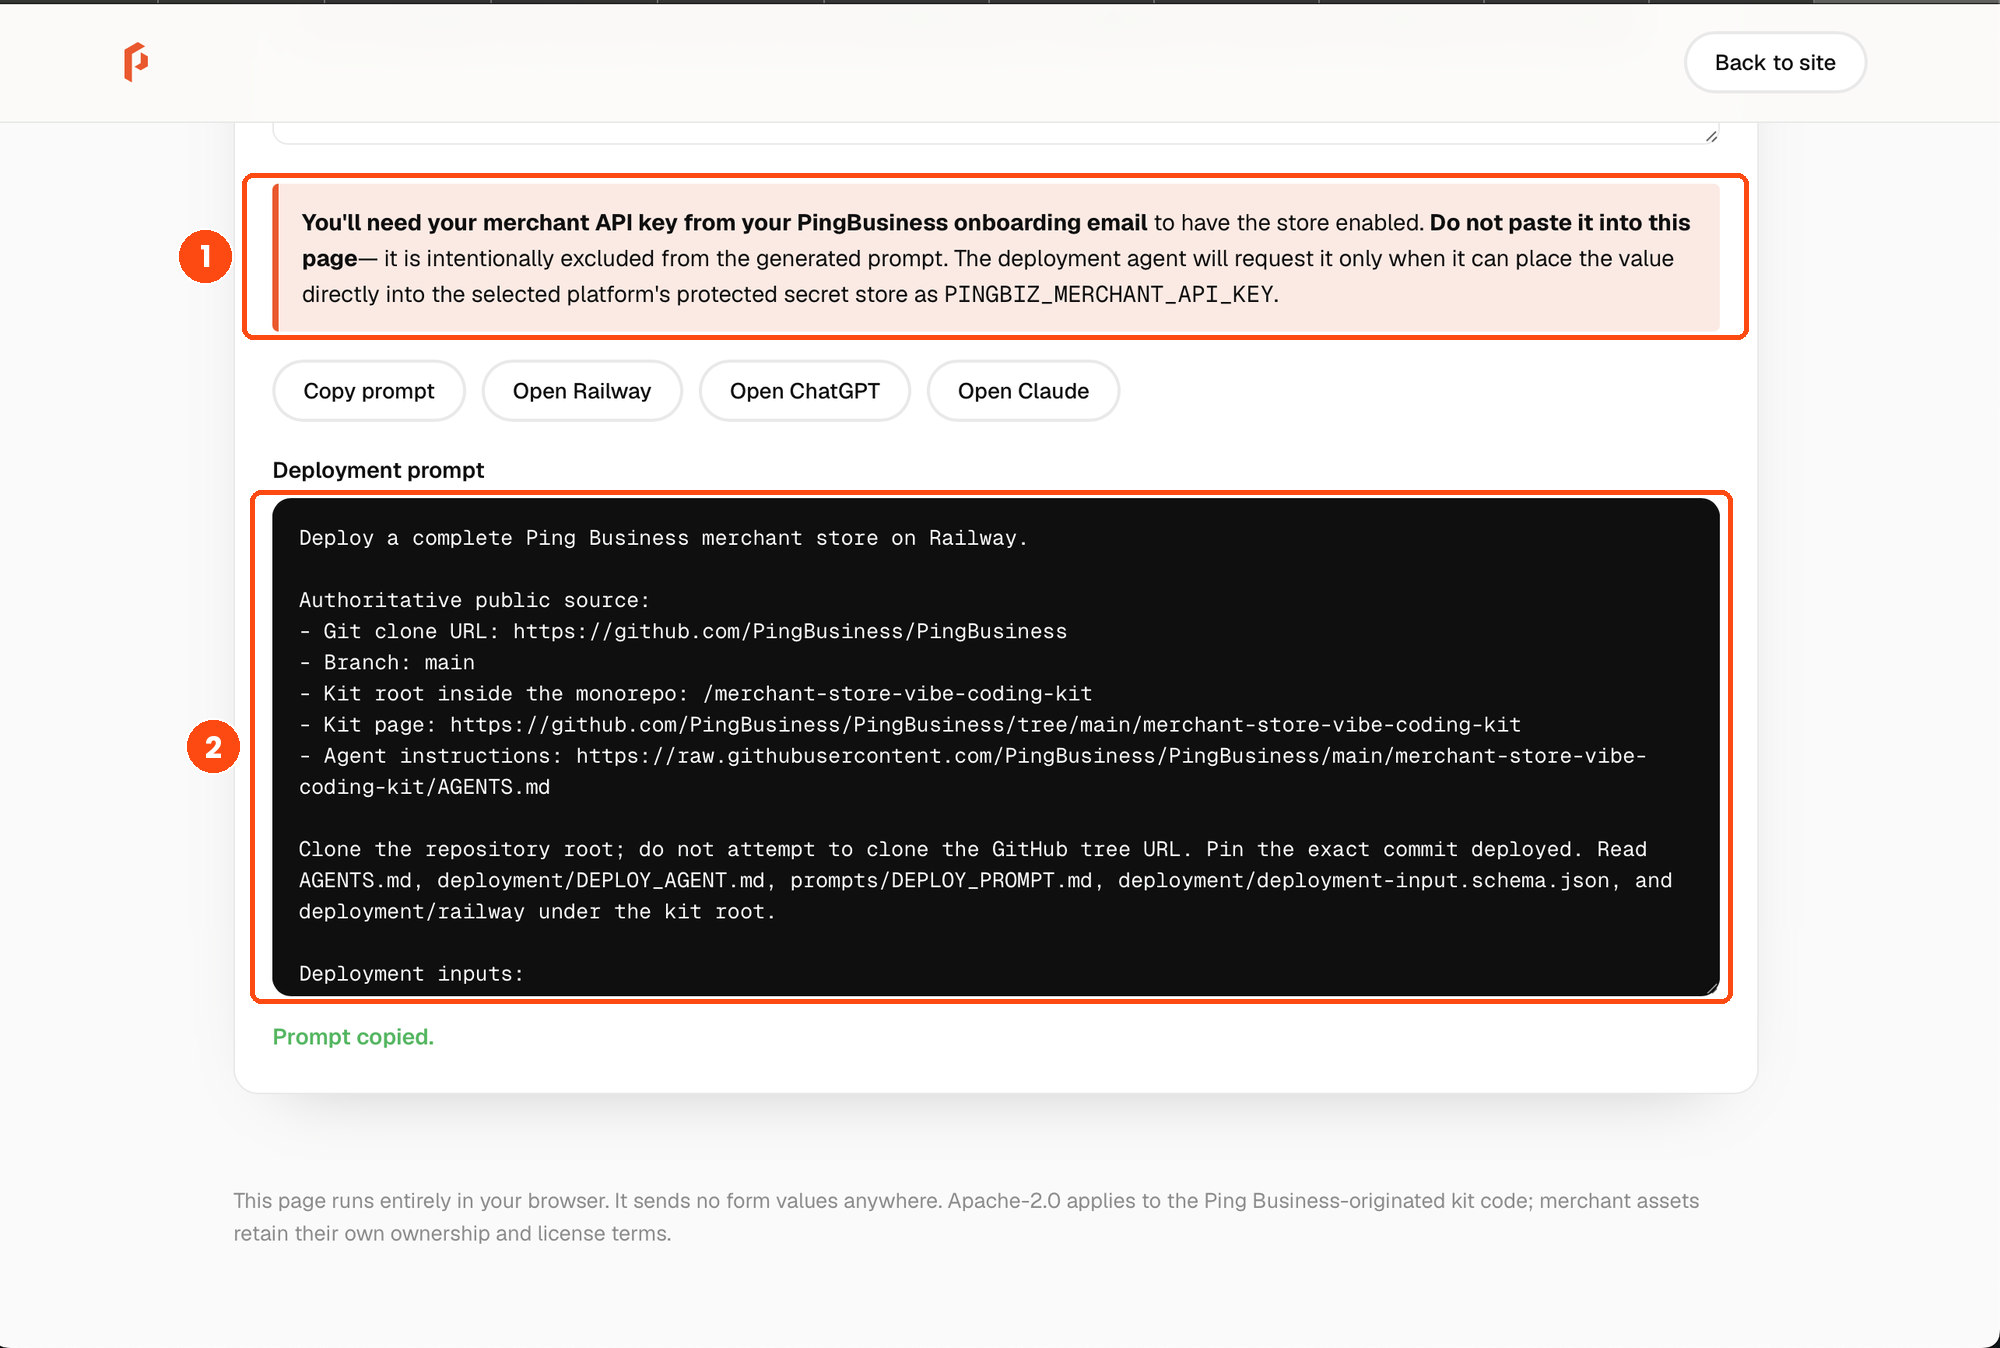
(1) Your key is deliberately left out (2) Copy and paste the prompt into Cursor
Answer the workflow questions
Before creating anything, Cursor will ask you a handful of questions - read the options
and pick one.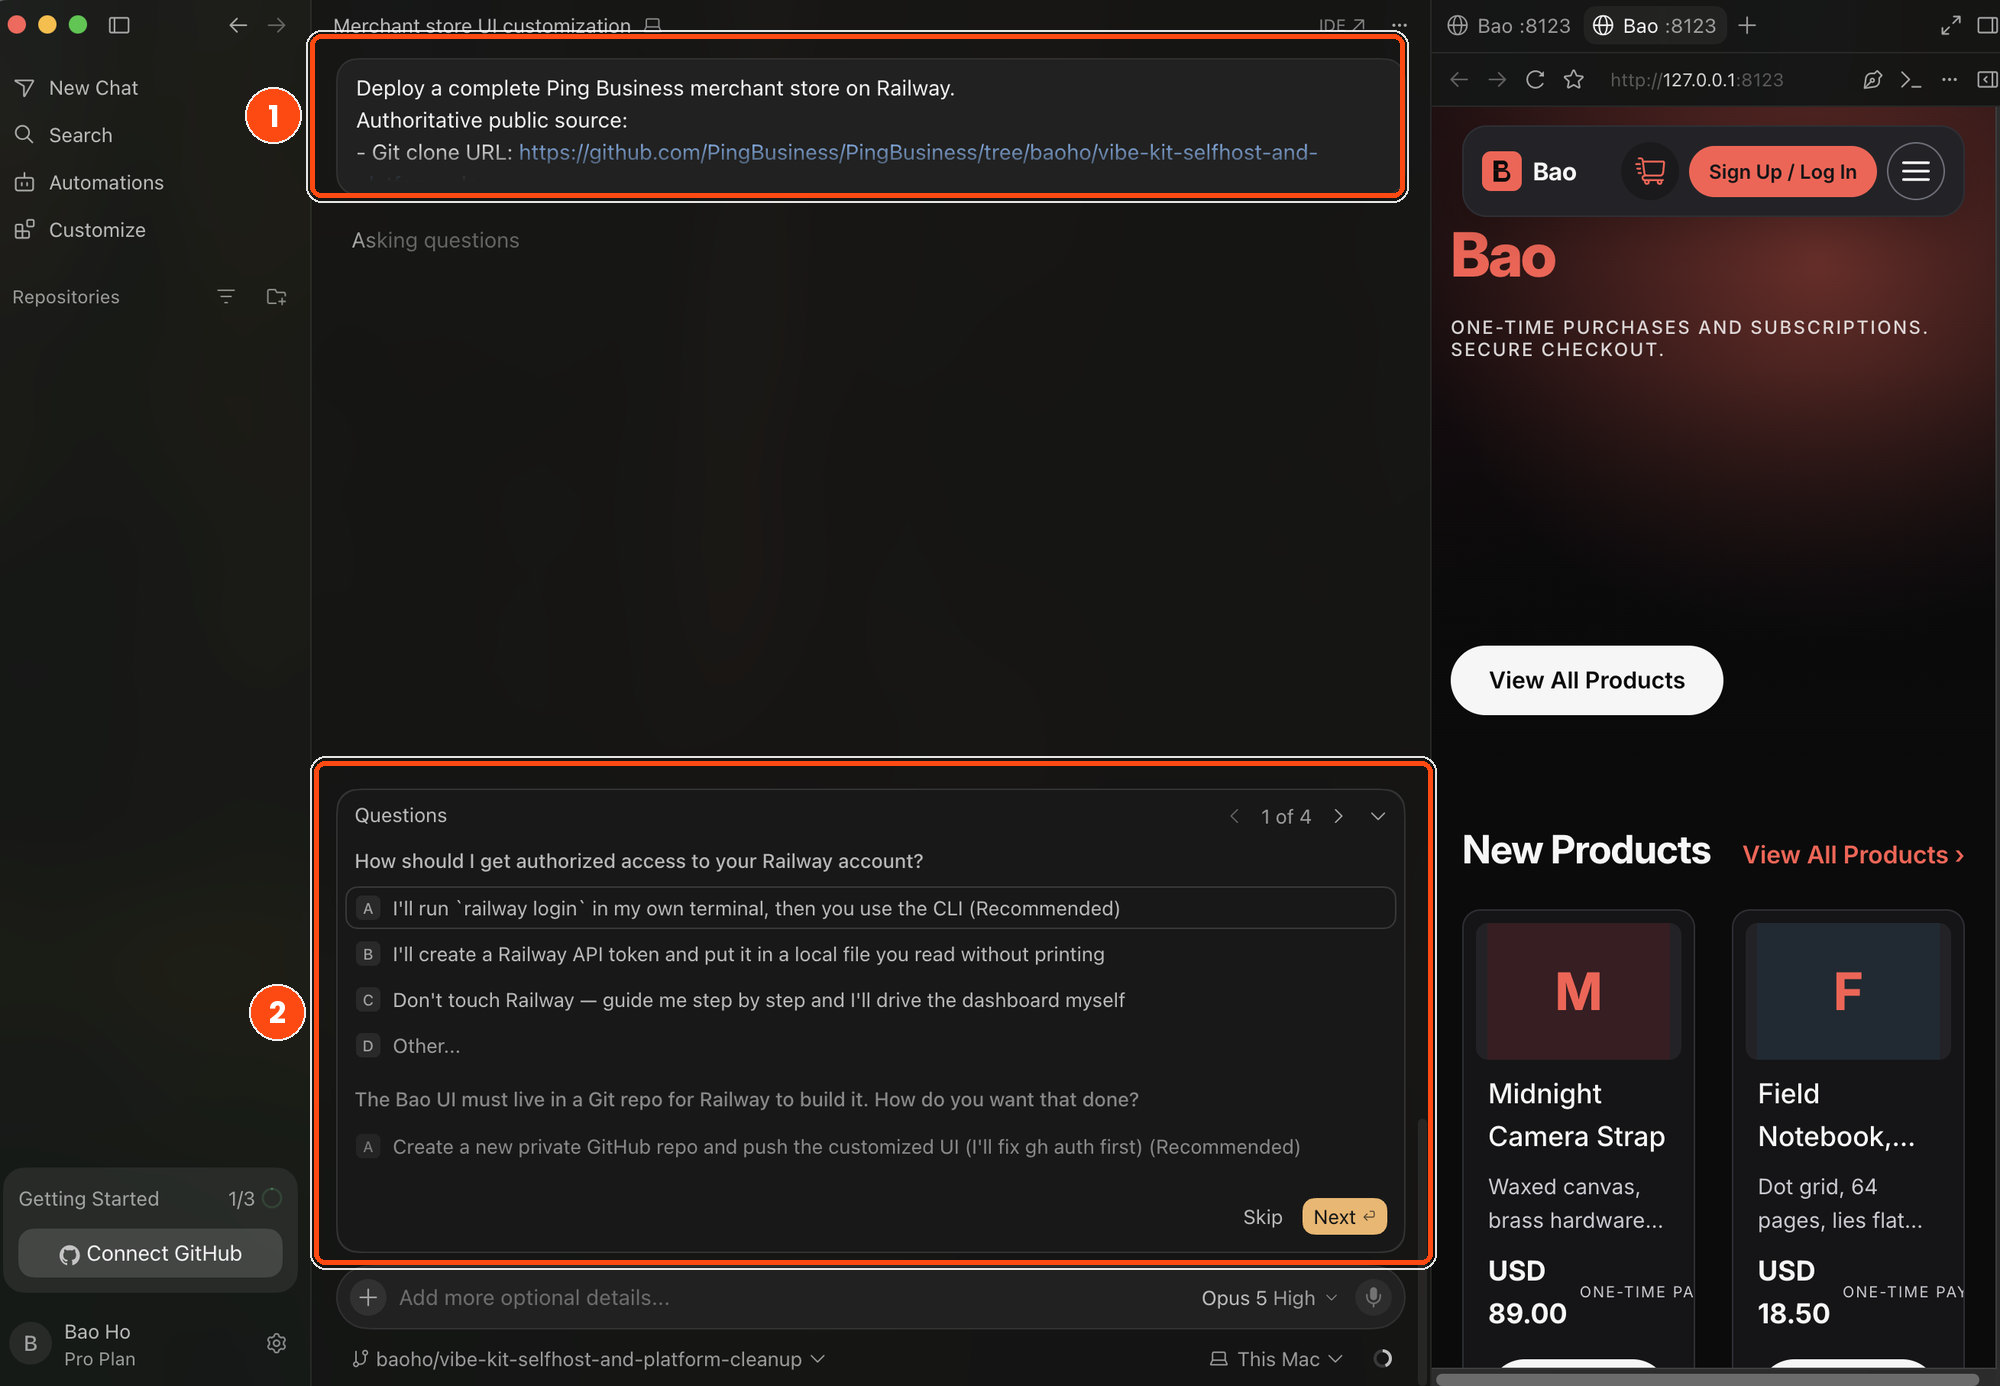
(1) The prompt (2) The options, including doing it yourself
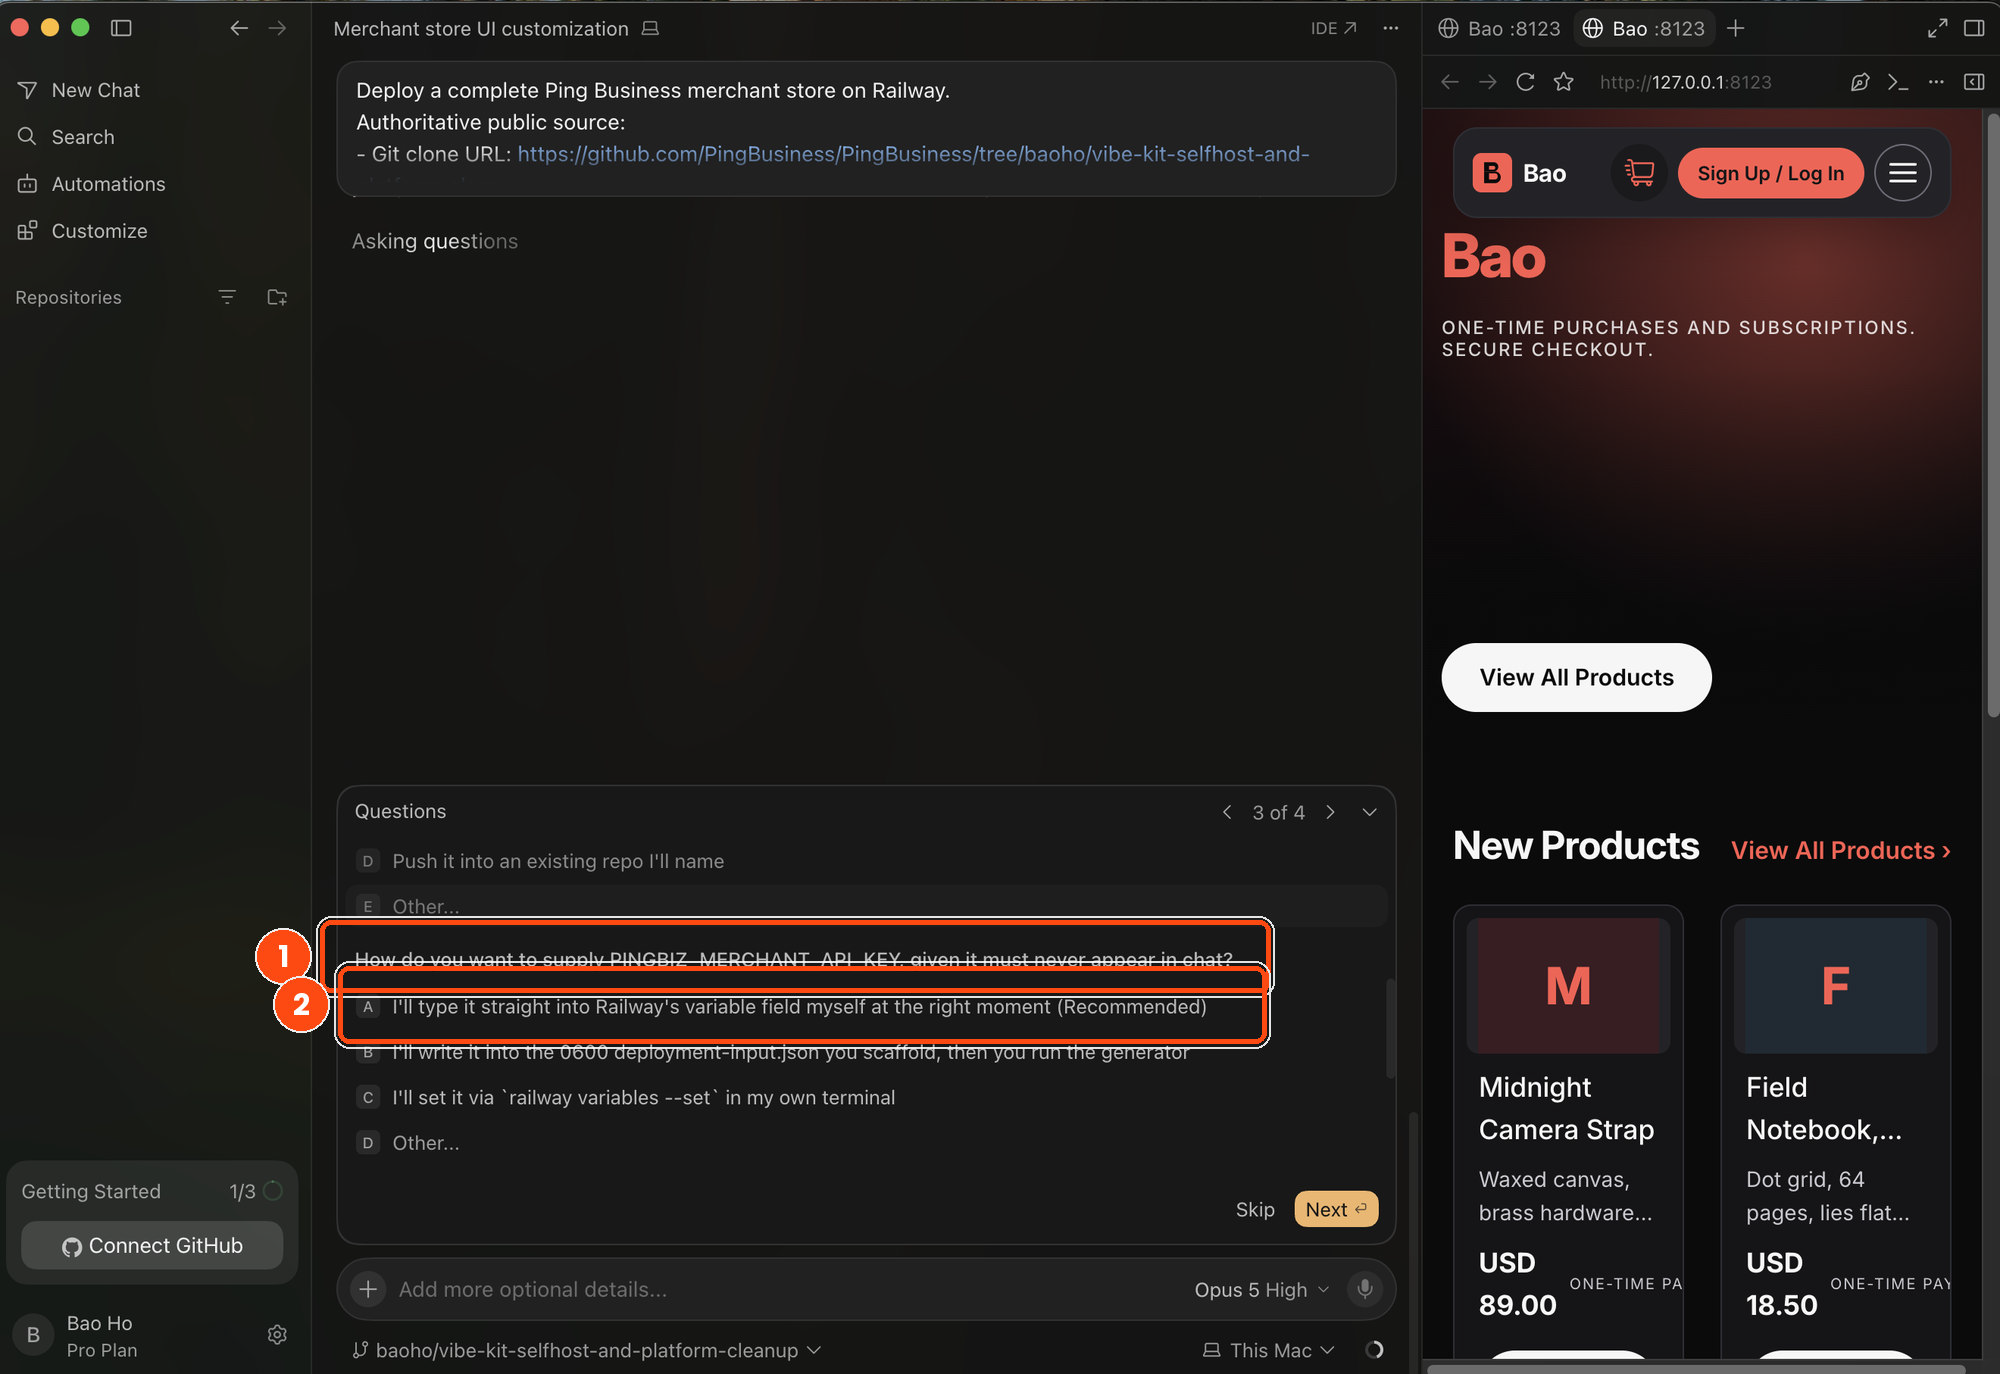
Cursor and any other AI assistant will not ask or accept merchant key in the chat. Every option keeps it out of the conversation.
The answers most people want:
• Railway access - let it use the command-line tool after you log in yourself. You stay in control of the login.
• Where the code lives - let it create a private repository and push your shop there. Railway builds from that.
• Your merchant key - the option where you type it into Railway’s own field, or into a file on your machine. Never the chat.
Approve the workflow
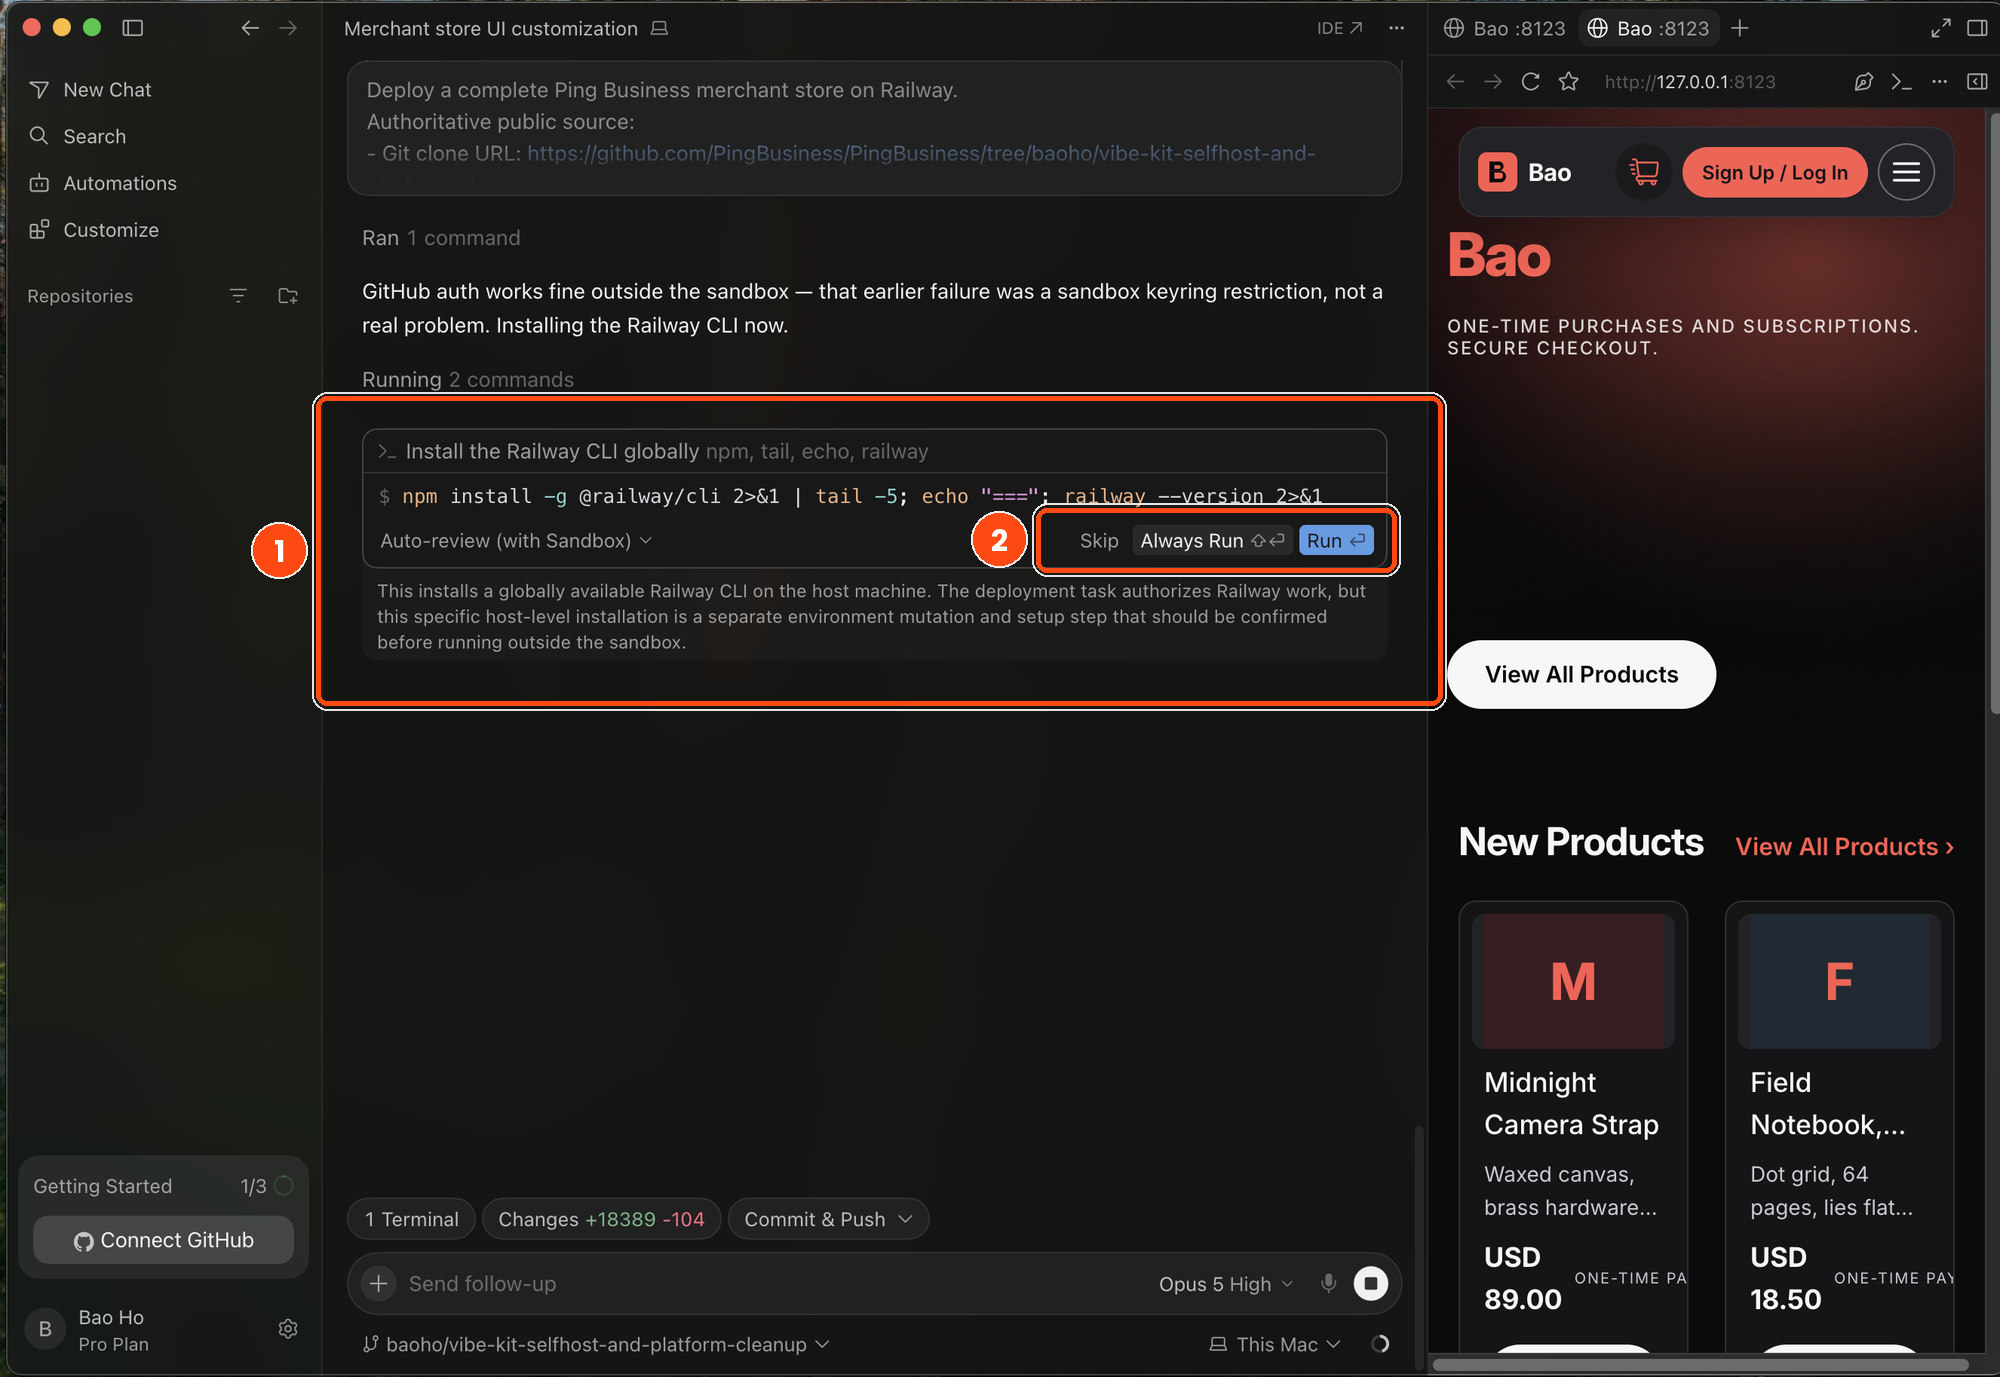
Cursor will show you each command before running it and waits for your approval - you can run once, or let it run this kind of command from now on.
Do the manual tasks
During this run, you will need to do 2 tasks manually as highlighted earlier.
- Sign into Railway
- Make sure you have a paid plan on Railway
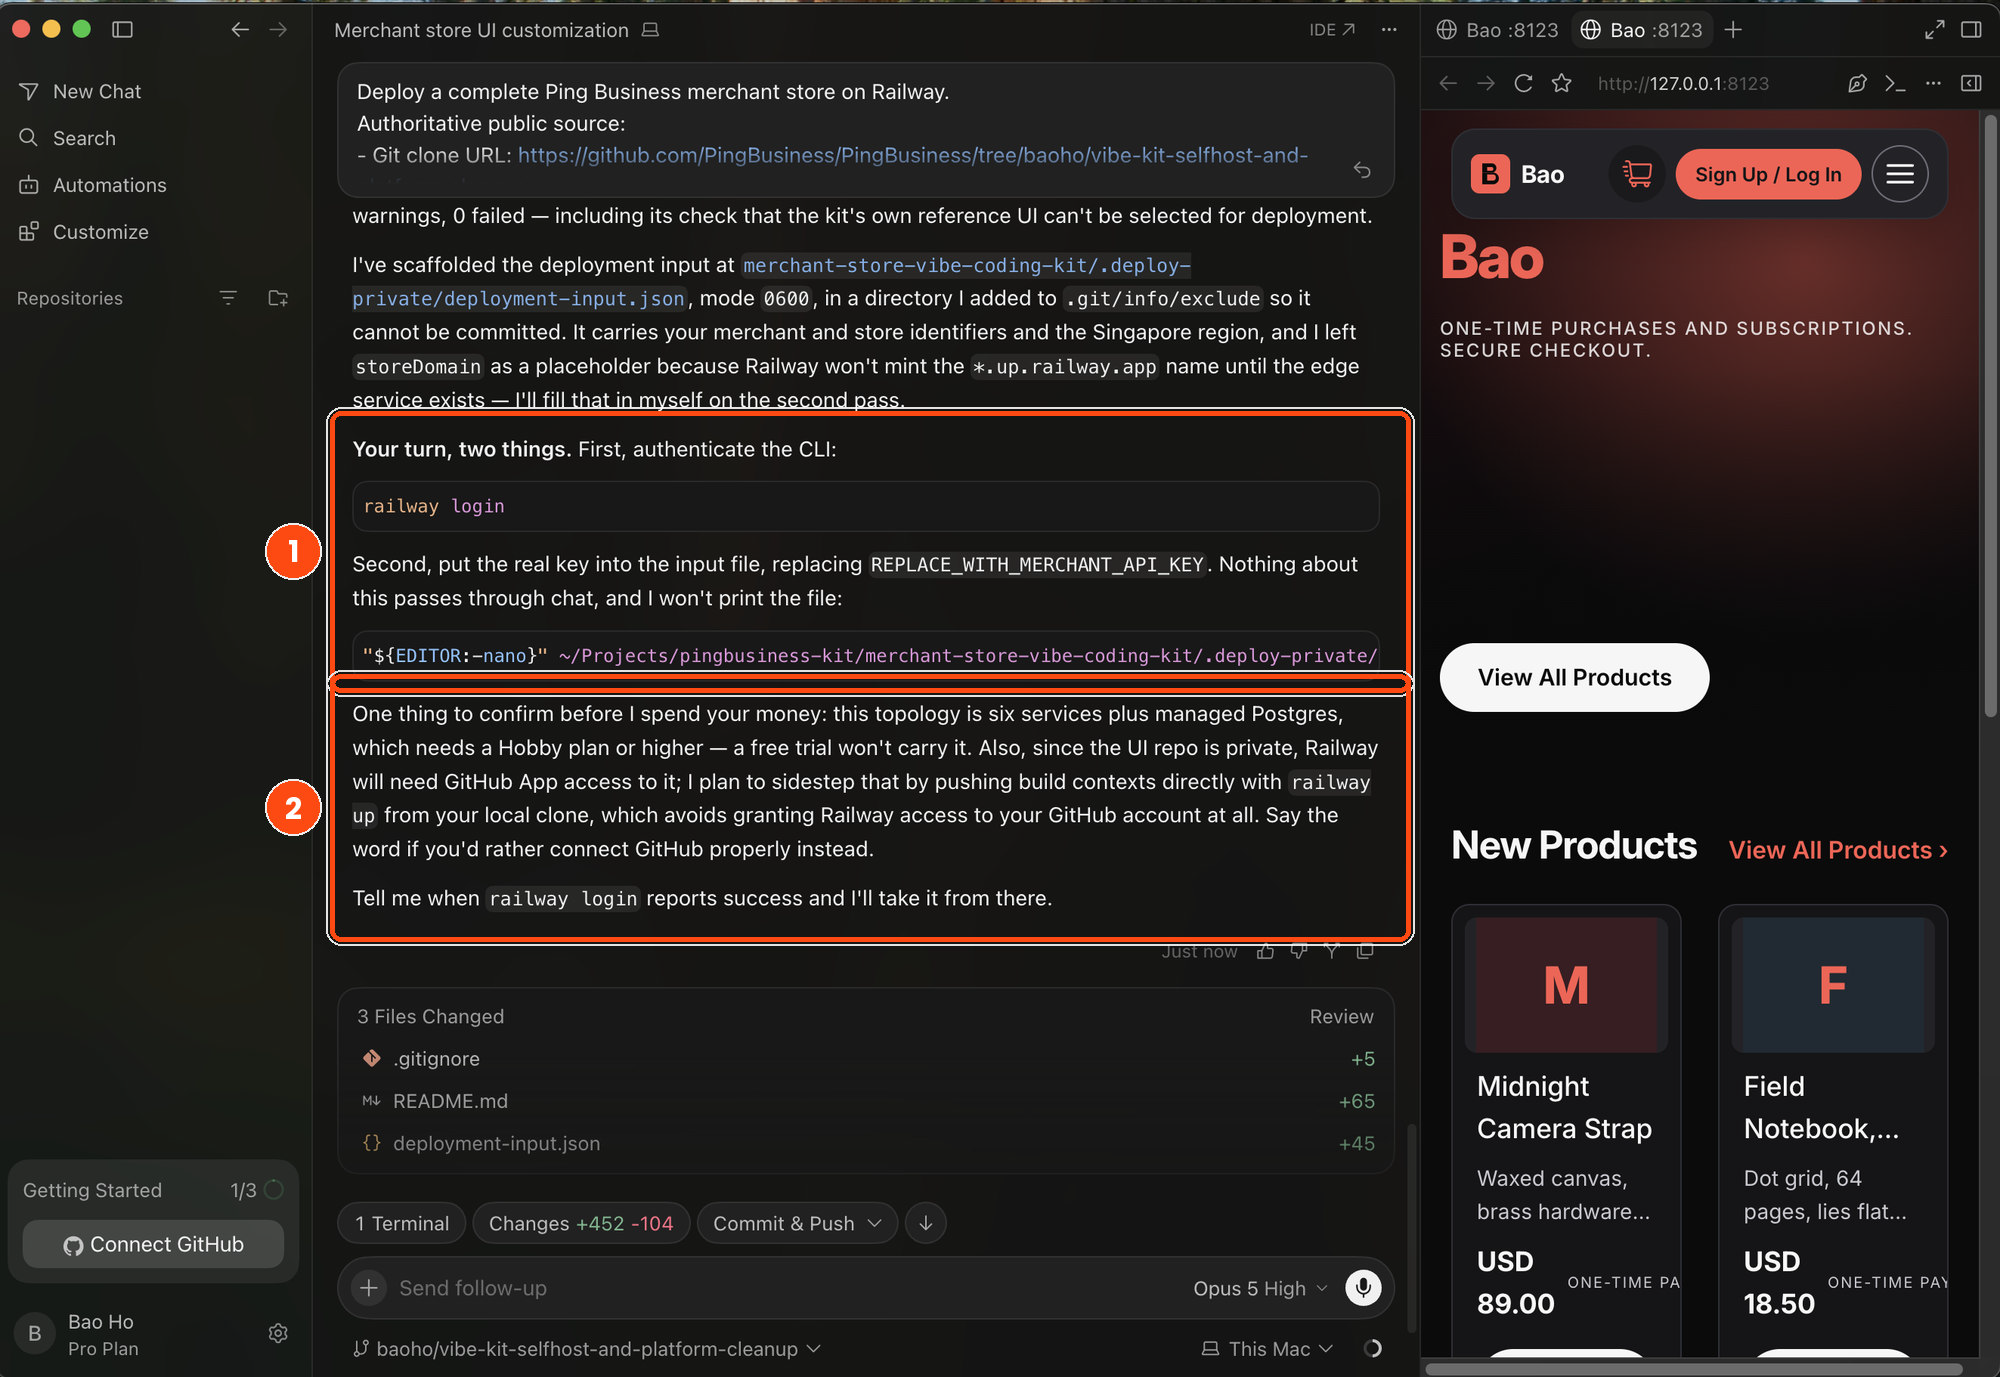
Notice it flags the plan before creating anything: six services plus a database won’t run on a free trial. That’s the right order - you get to decide before any money is involved.
Sign in to Railway
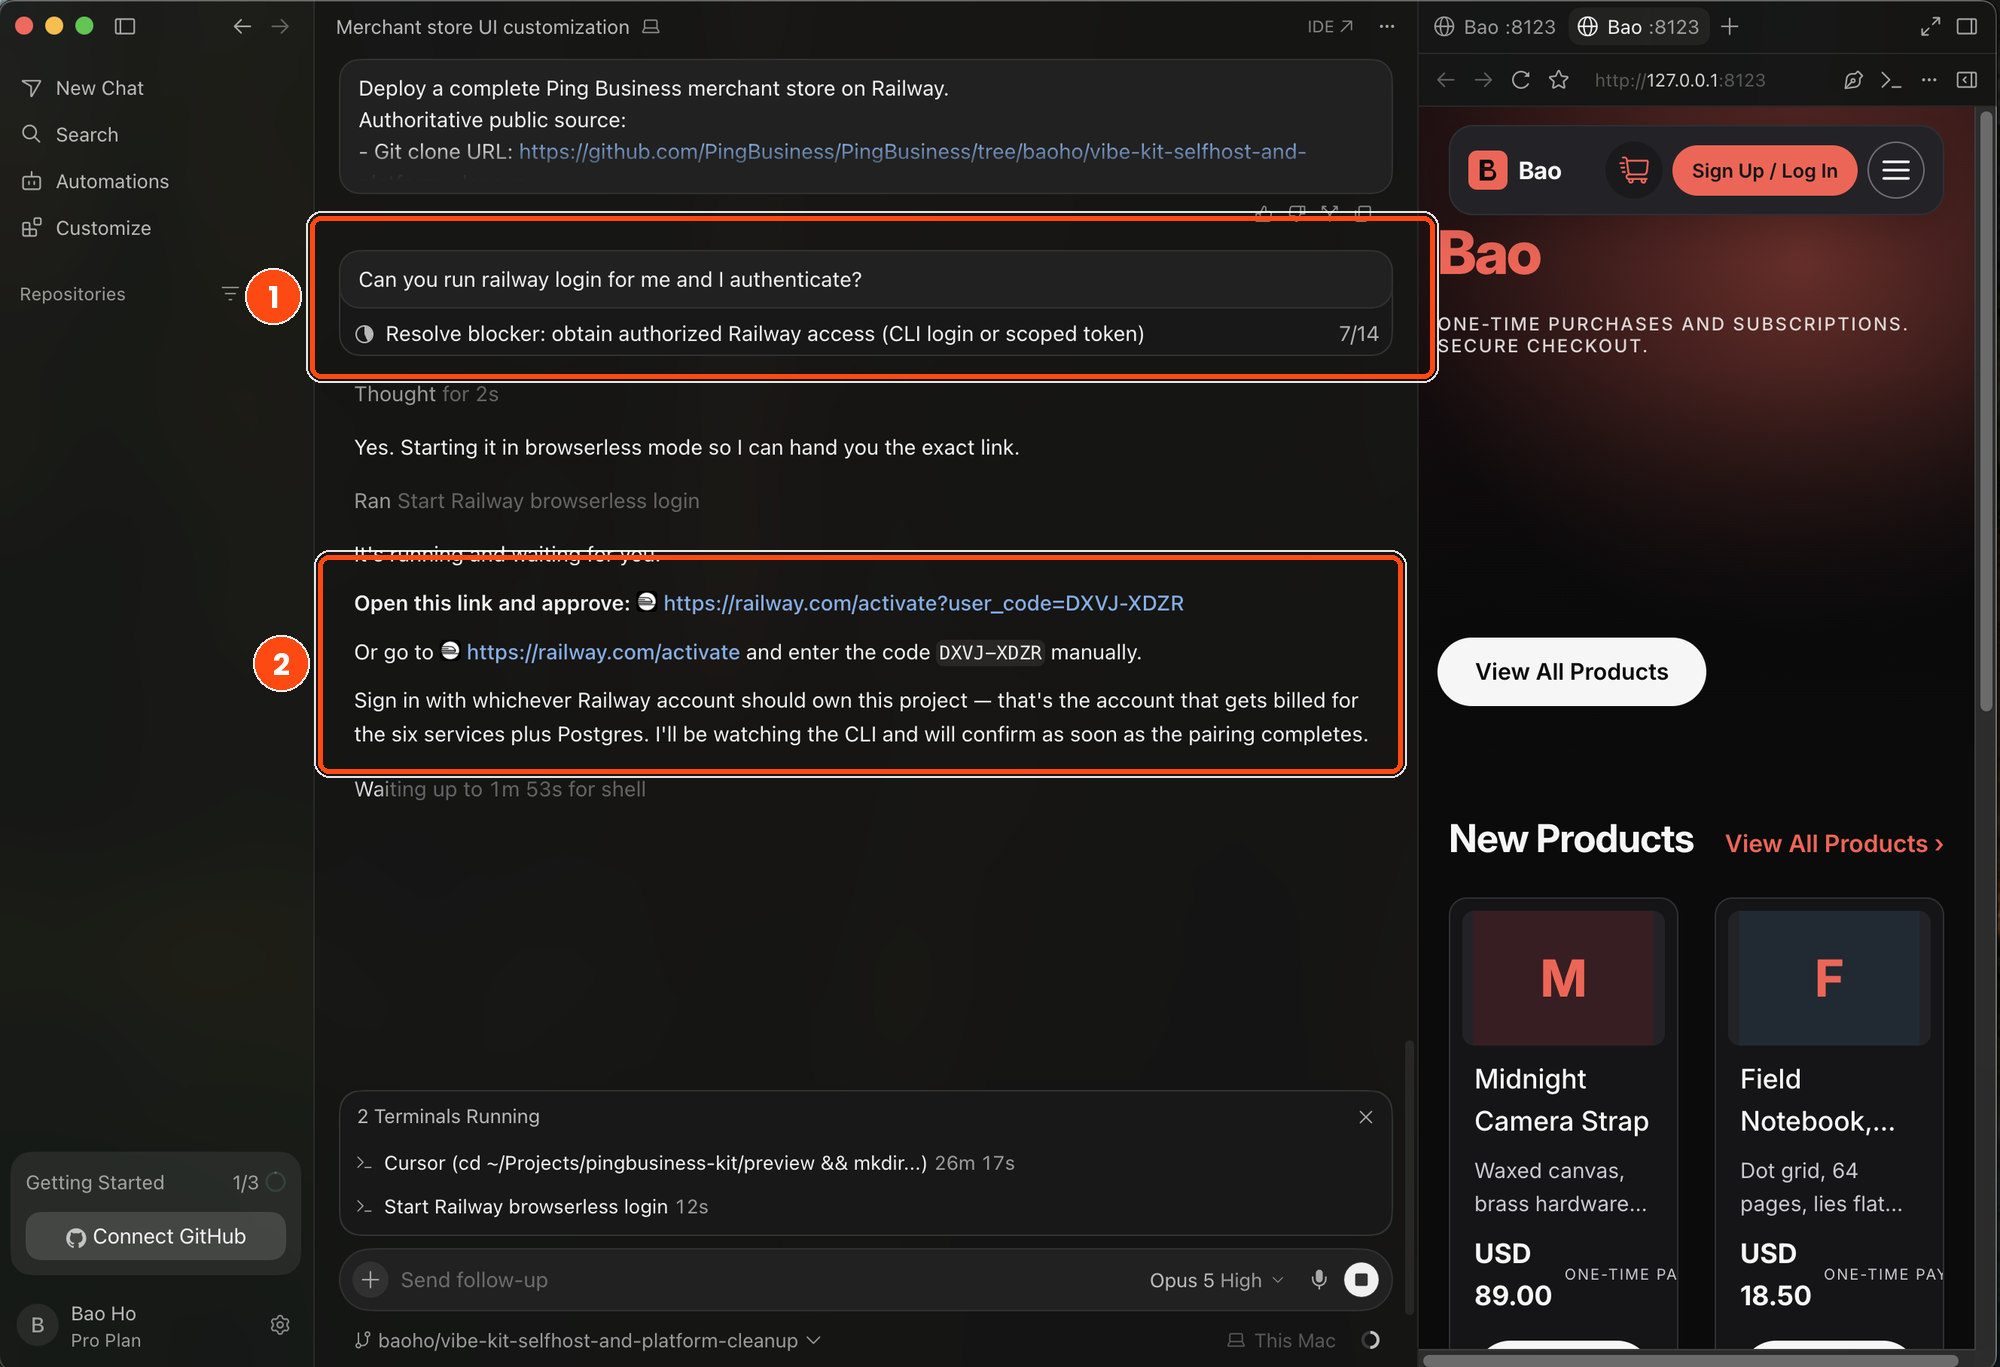
You can run the command to login on behalf via command (1), or login via the link provided in (2).
The command hands you a link and a code rather than trying to drive your browser. The account you sign in with is the account that gets billed.
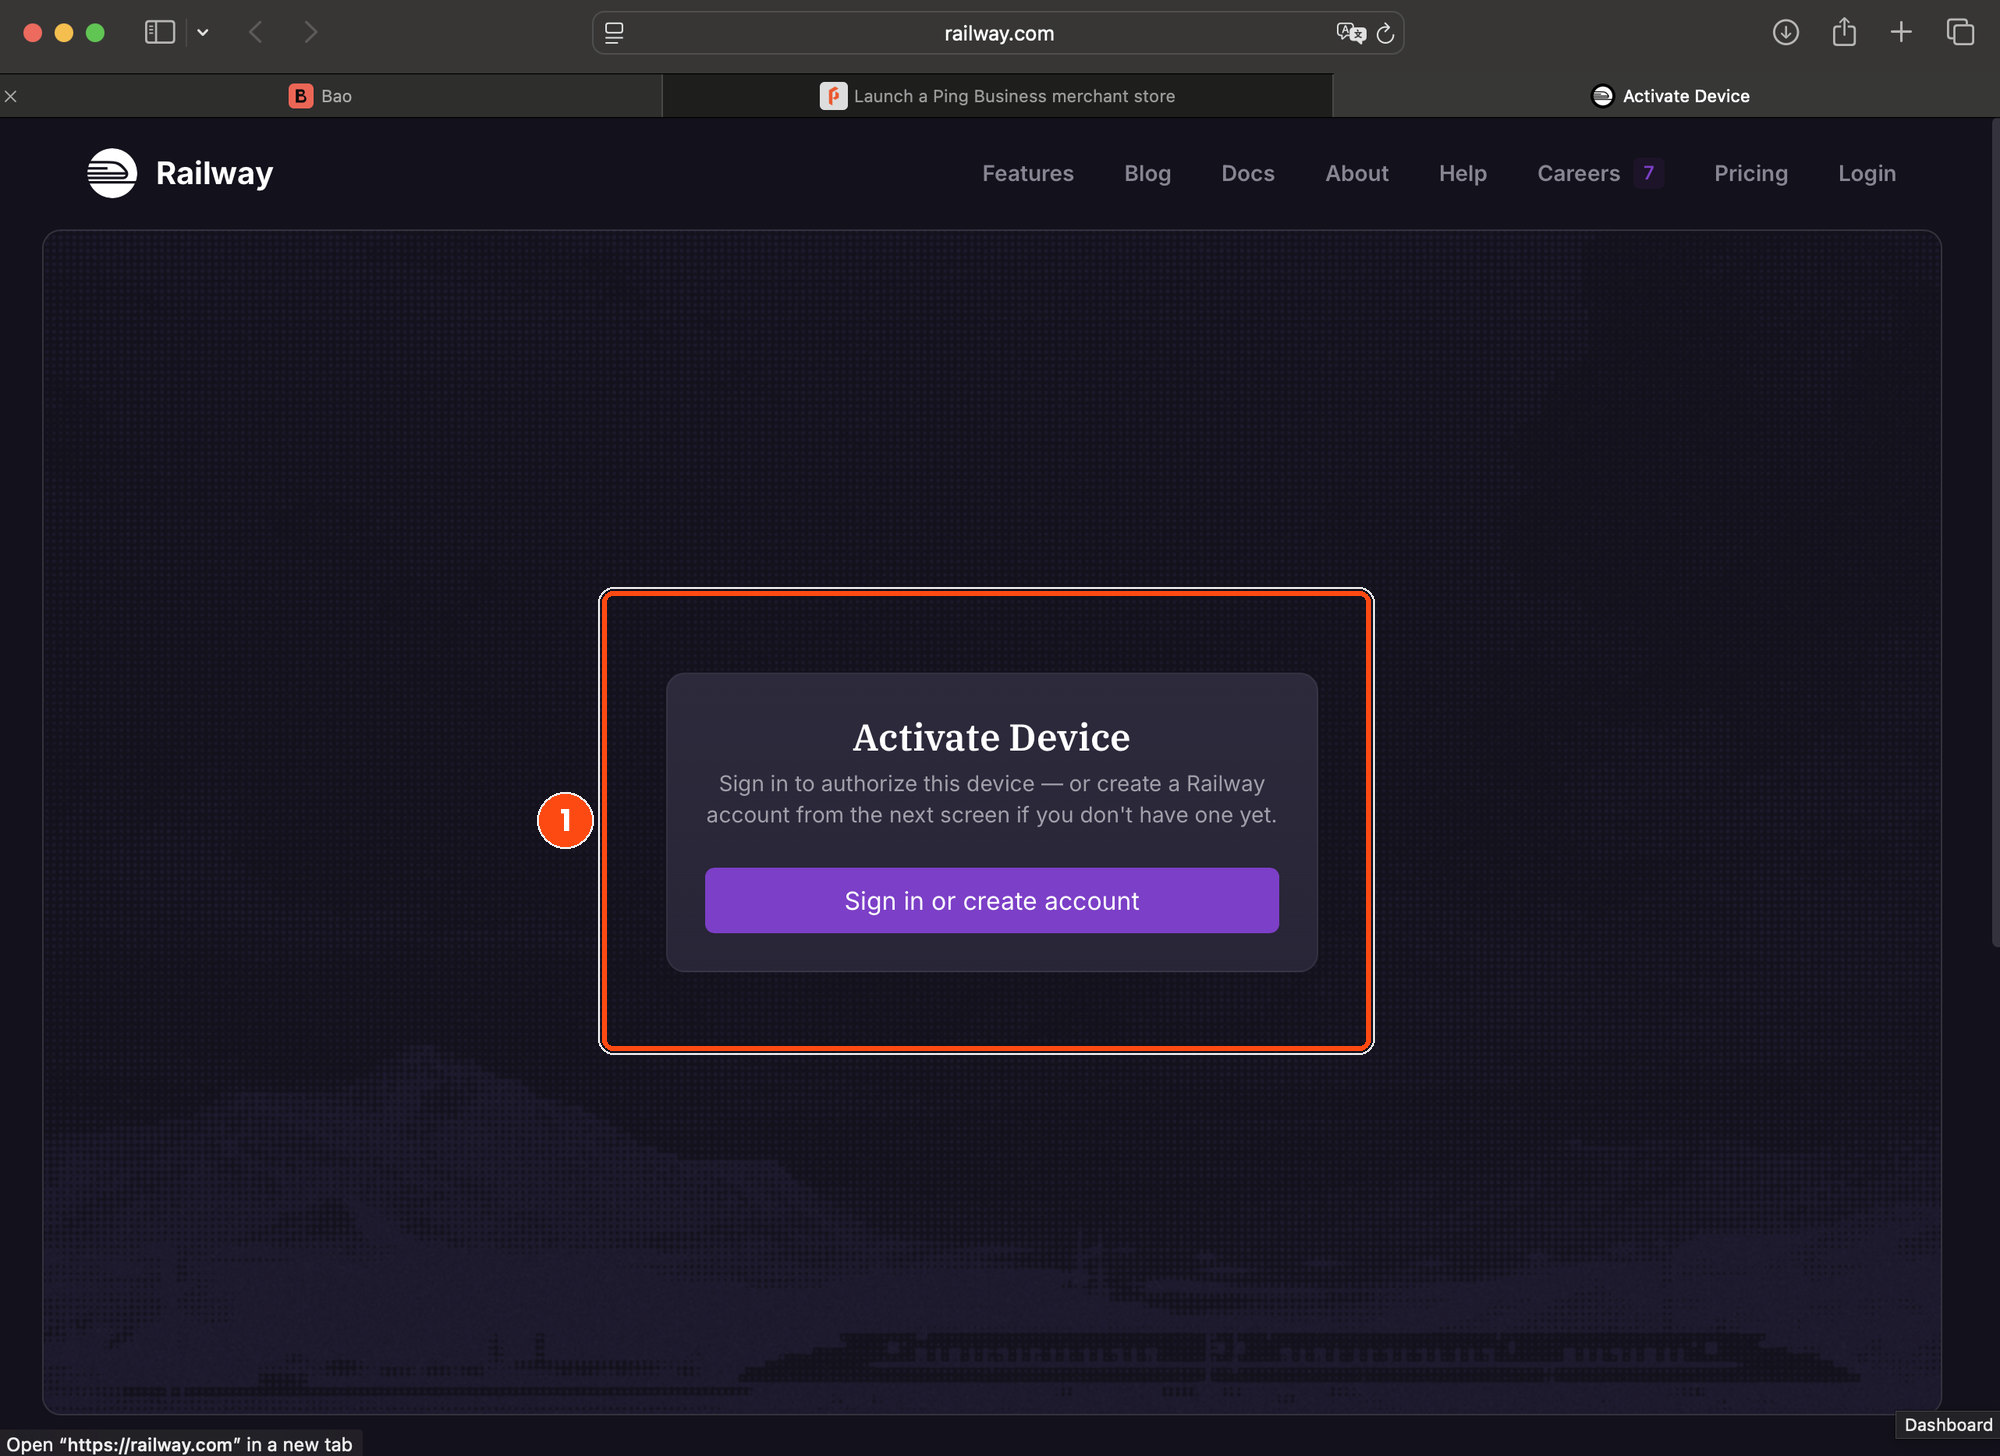
Sign in or create an account - this happens on your browser without Cursor seeing your password.
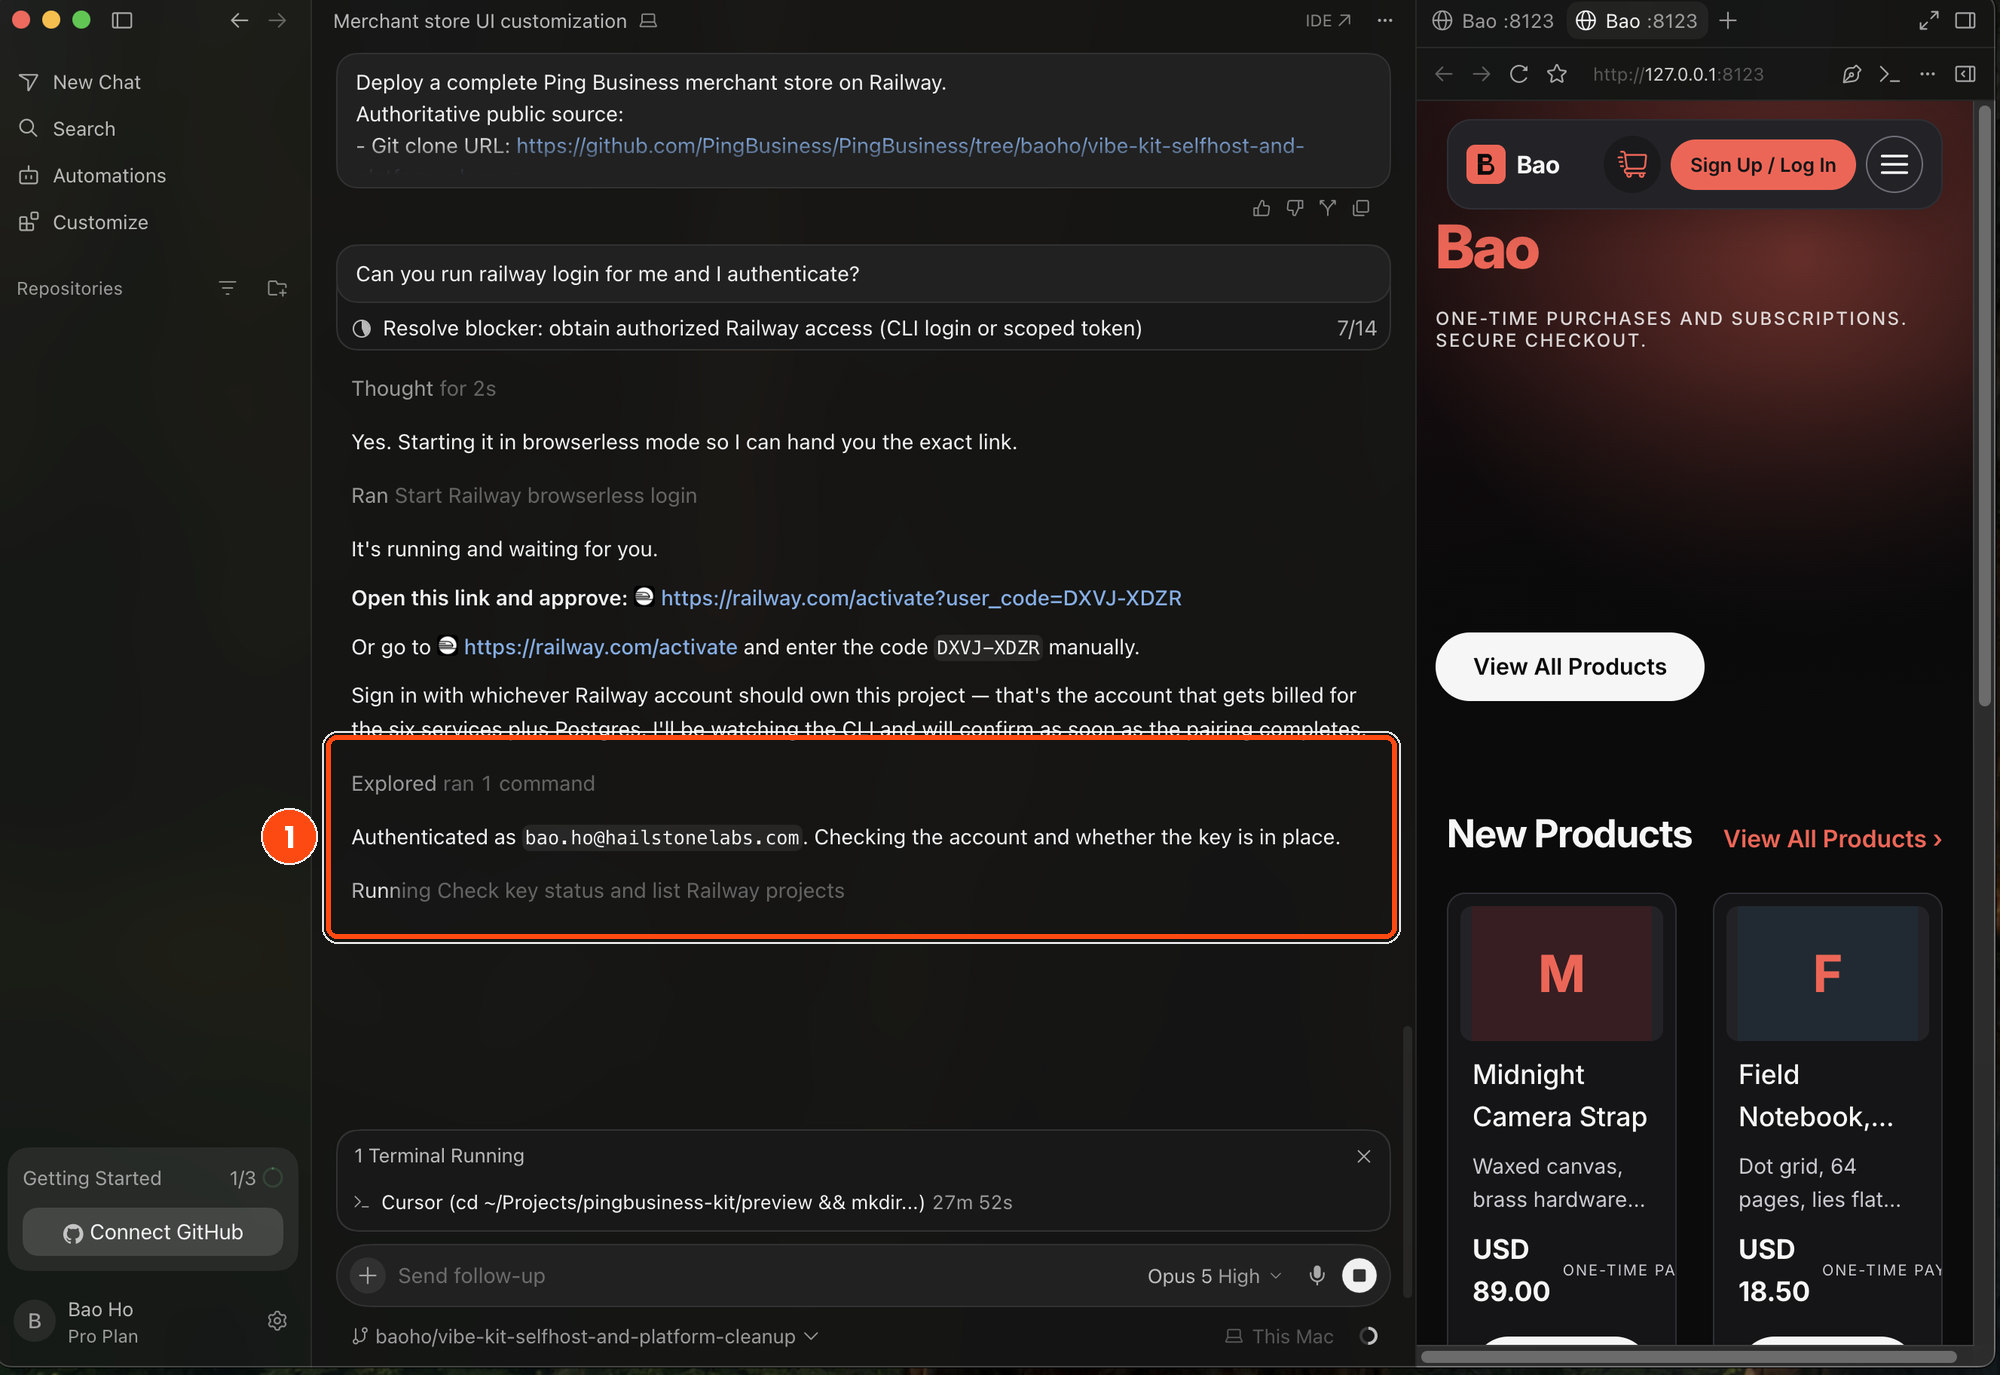
- If you’d rather not run commands yourself, just ask it to run the login for you.
- Open the link provided, or go to the activate page and type the code.
- Sign in - or create a Railway account there if you don’t have one.
- Come back and tell it you’re done.
Check your plan on Railway
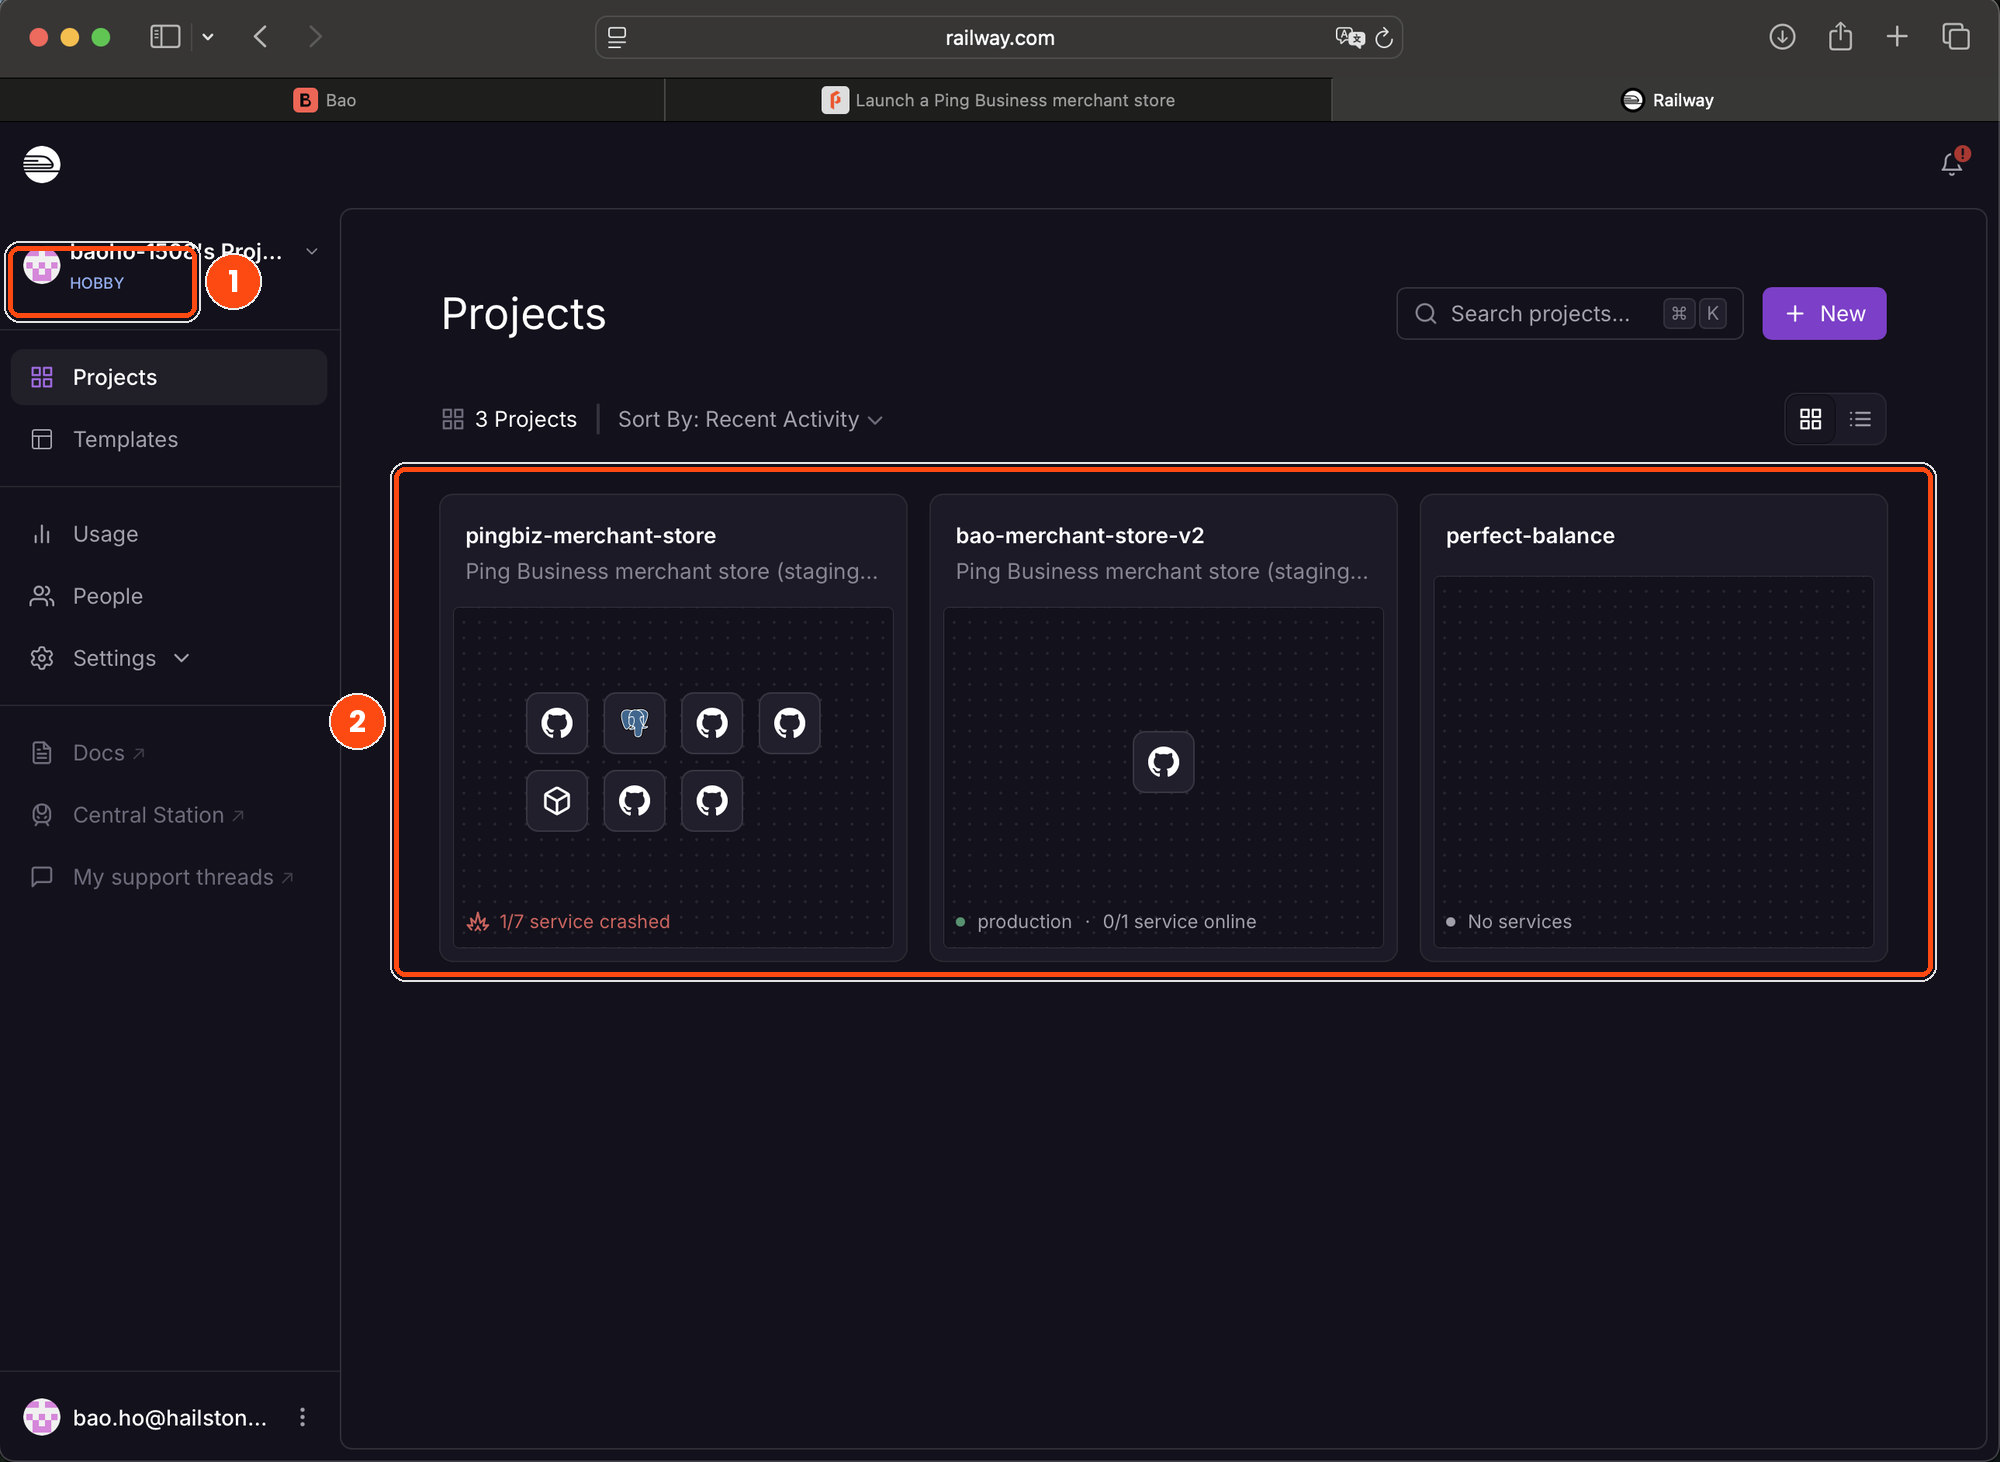
(1) Your current plan (2) Your projects
IMPORTANT: Adding a card is not the same as being on a plan that can run a shop.
If you stay on a trial or free tier, the next attempt fails with a message about limits or resources. Move onto Hobby plan ($5 a month) or higher at the same time as adding the card, and you’ll skip a whole round of confusion.
Let it build and check the work
Back to Cursor, you should have Railway access enabled with the prompt working now to build the store without requiring further action during this step.
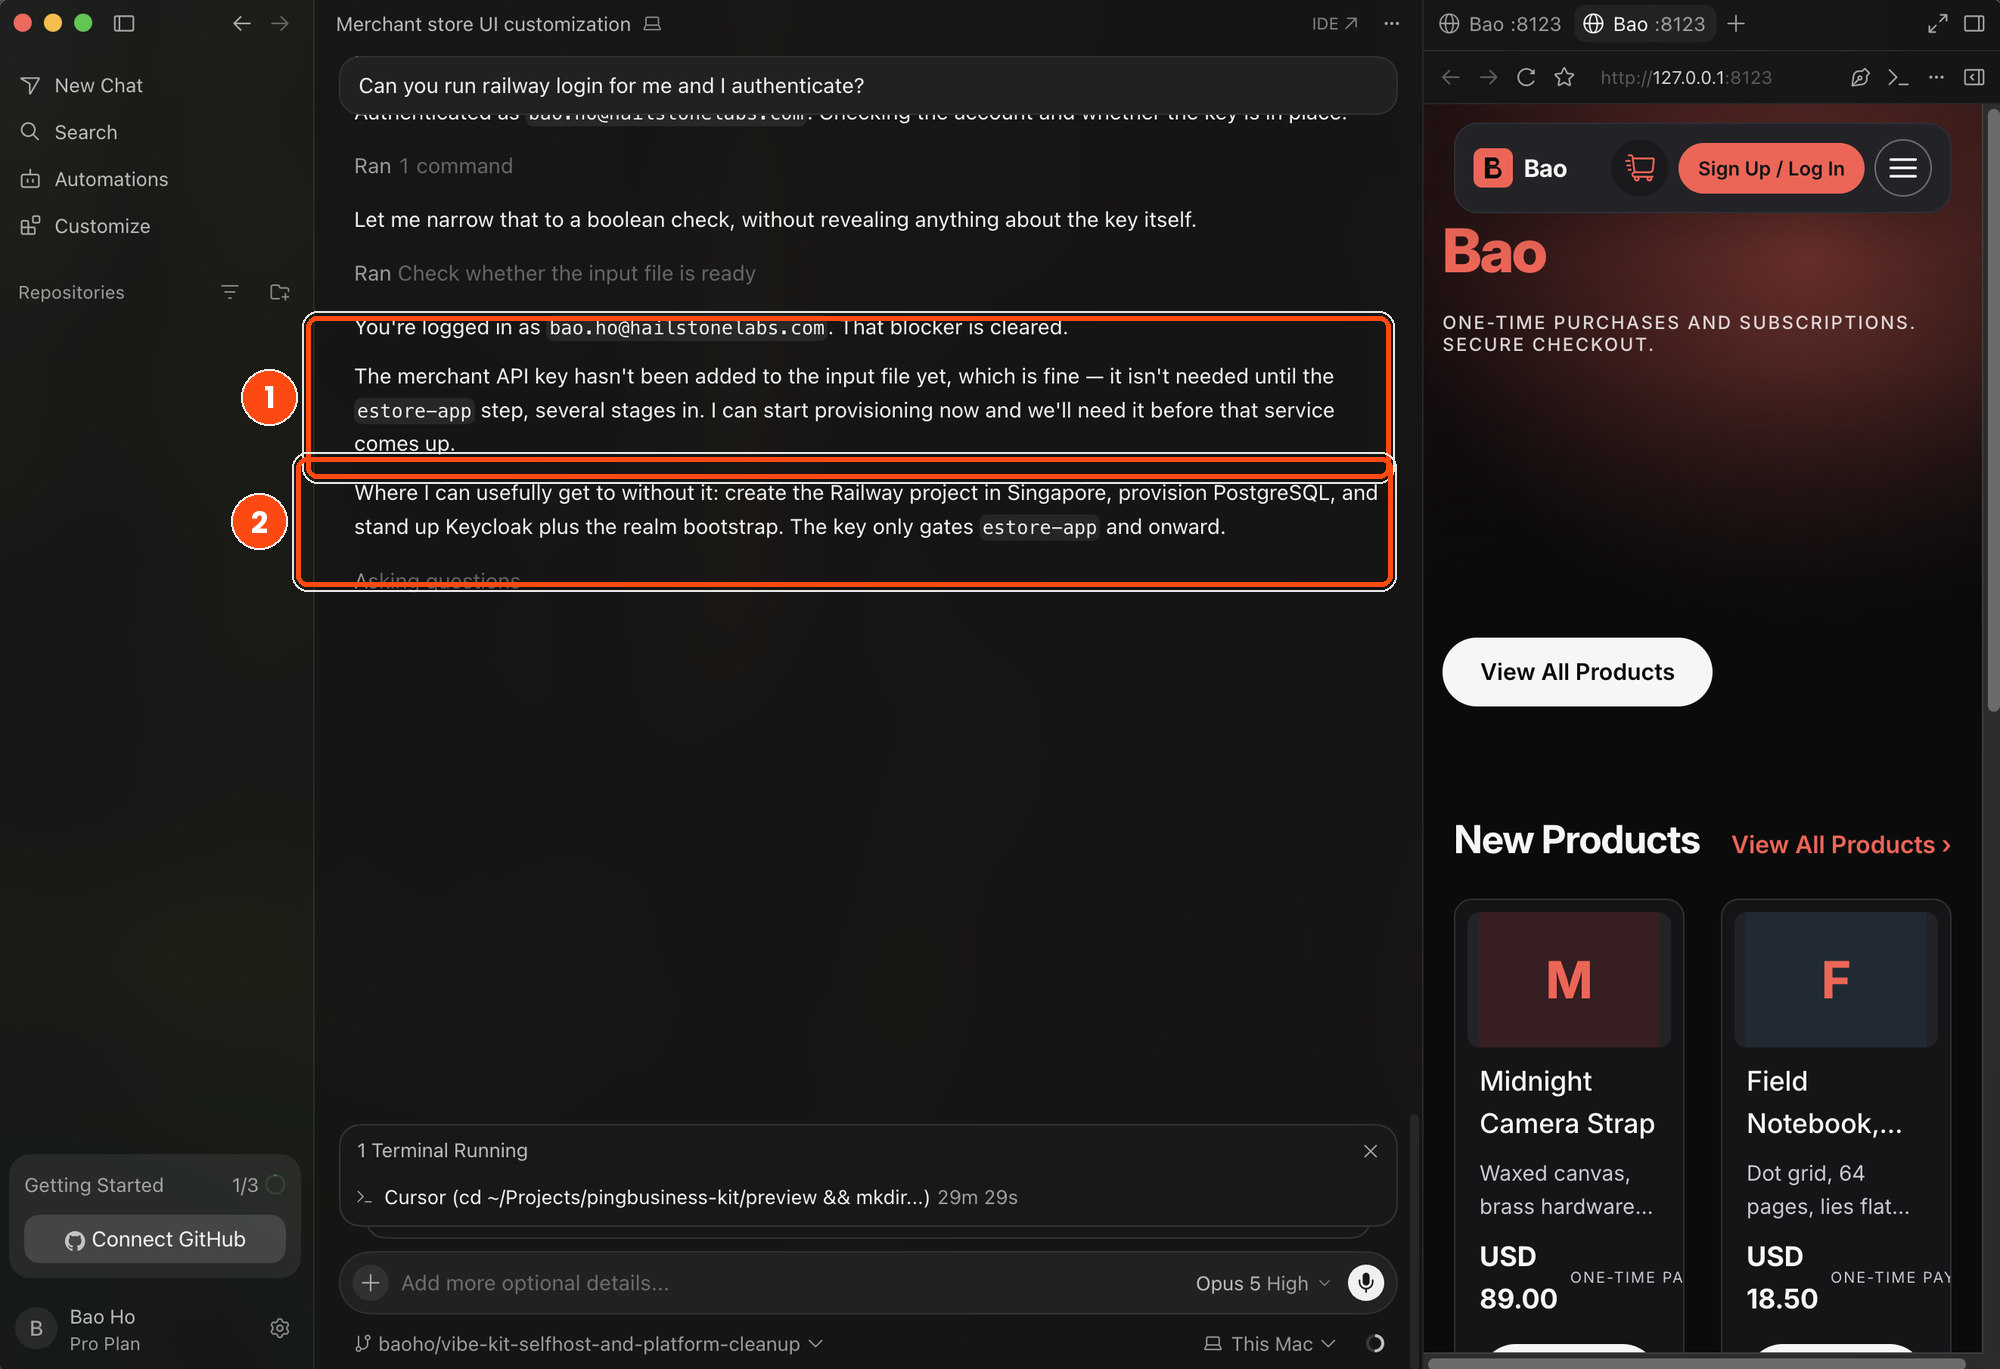
(1) Making sure the blocker is cleared (2) What will be built first
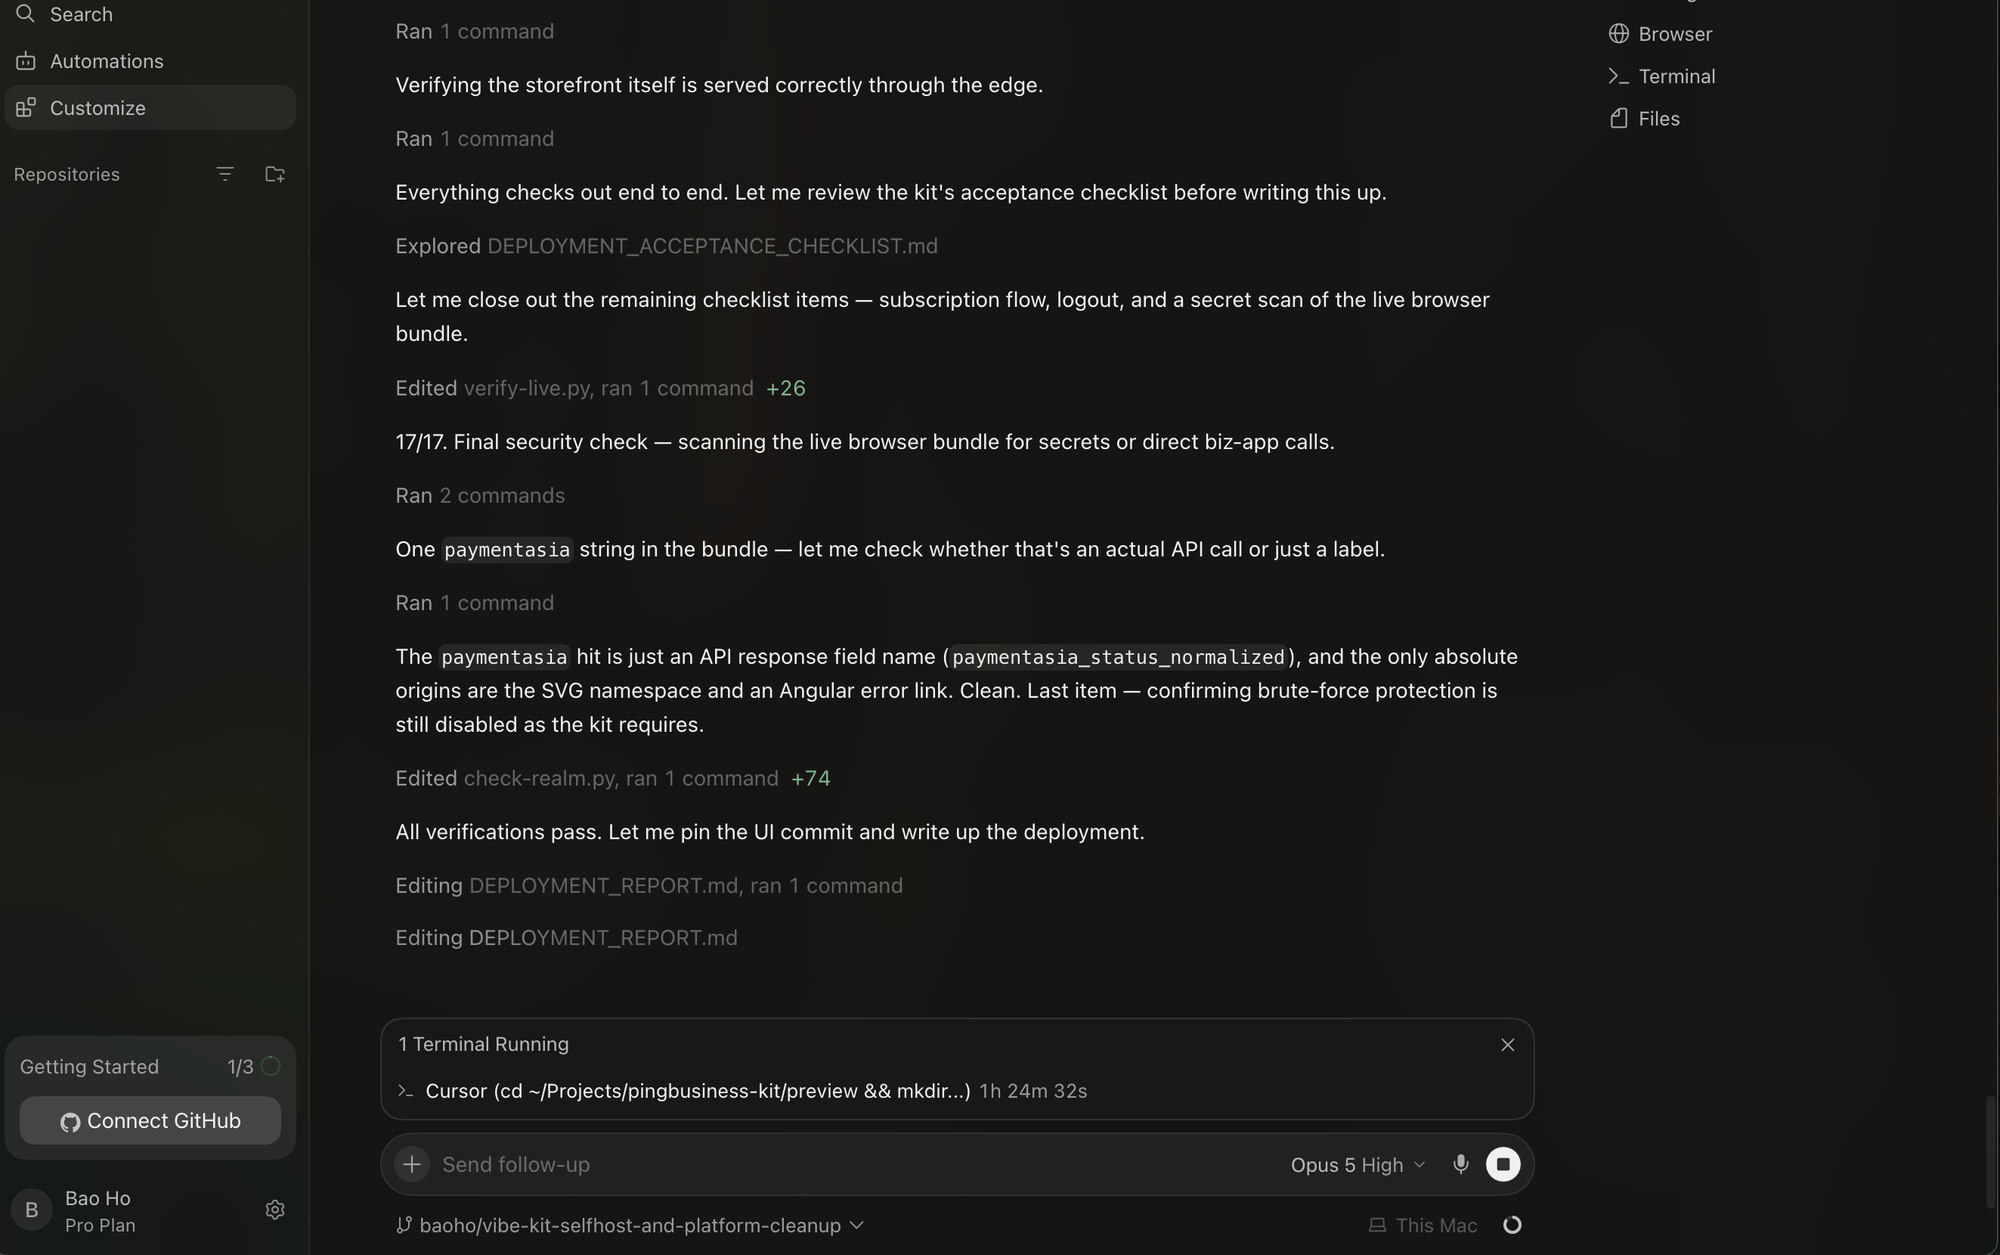
Cursor will run the kit’s acceptance checklist and scans the live page for leaked secrets before telling you it is done.
At this step, you don't have to watch every action. Go and do something else, and if it hits a problem, it will stop and tell you - you can refer to Store Launcher Troubleshoot Guide to navigate issues that happen here.
Congratulations! Your store is now live
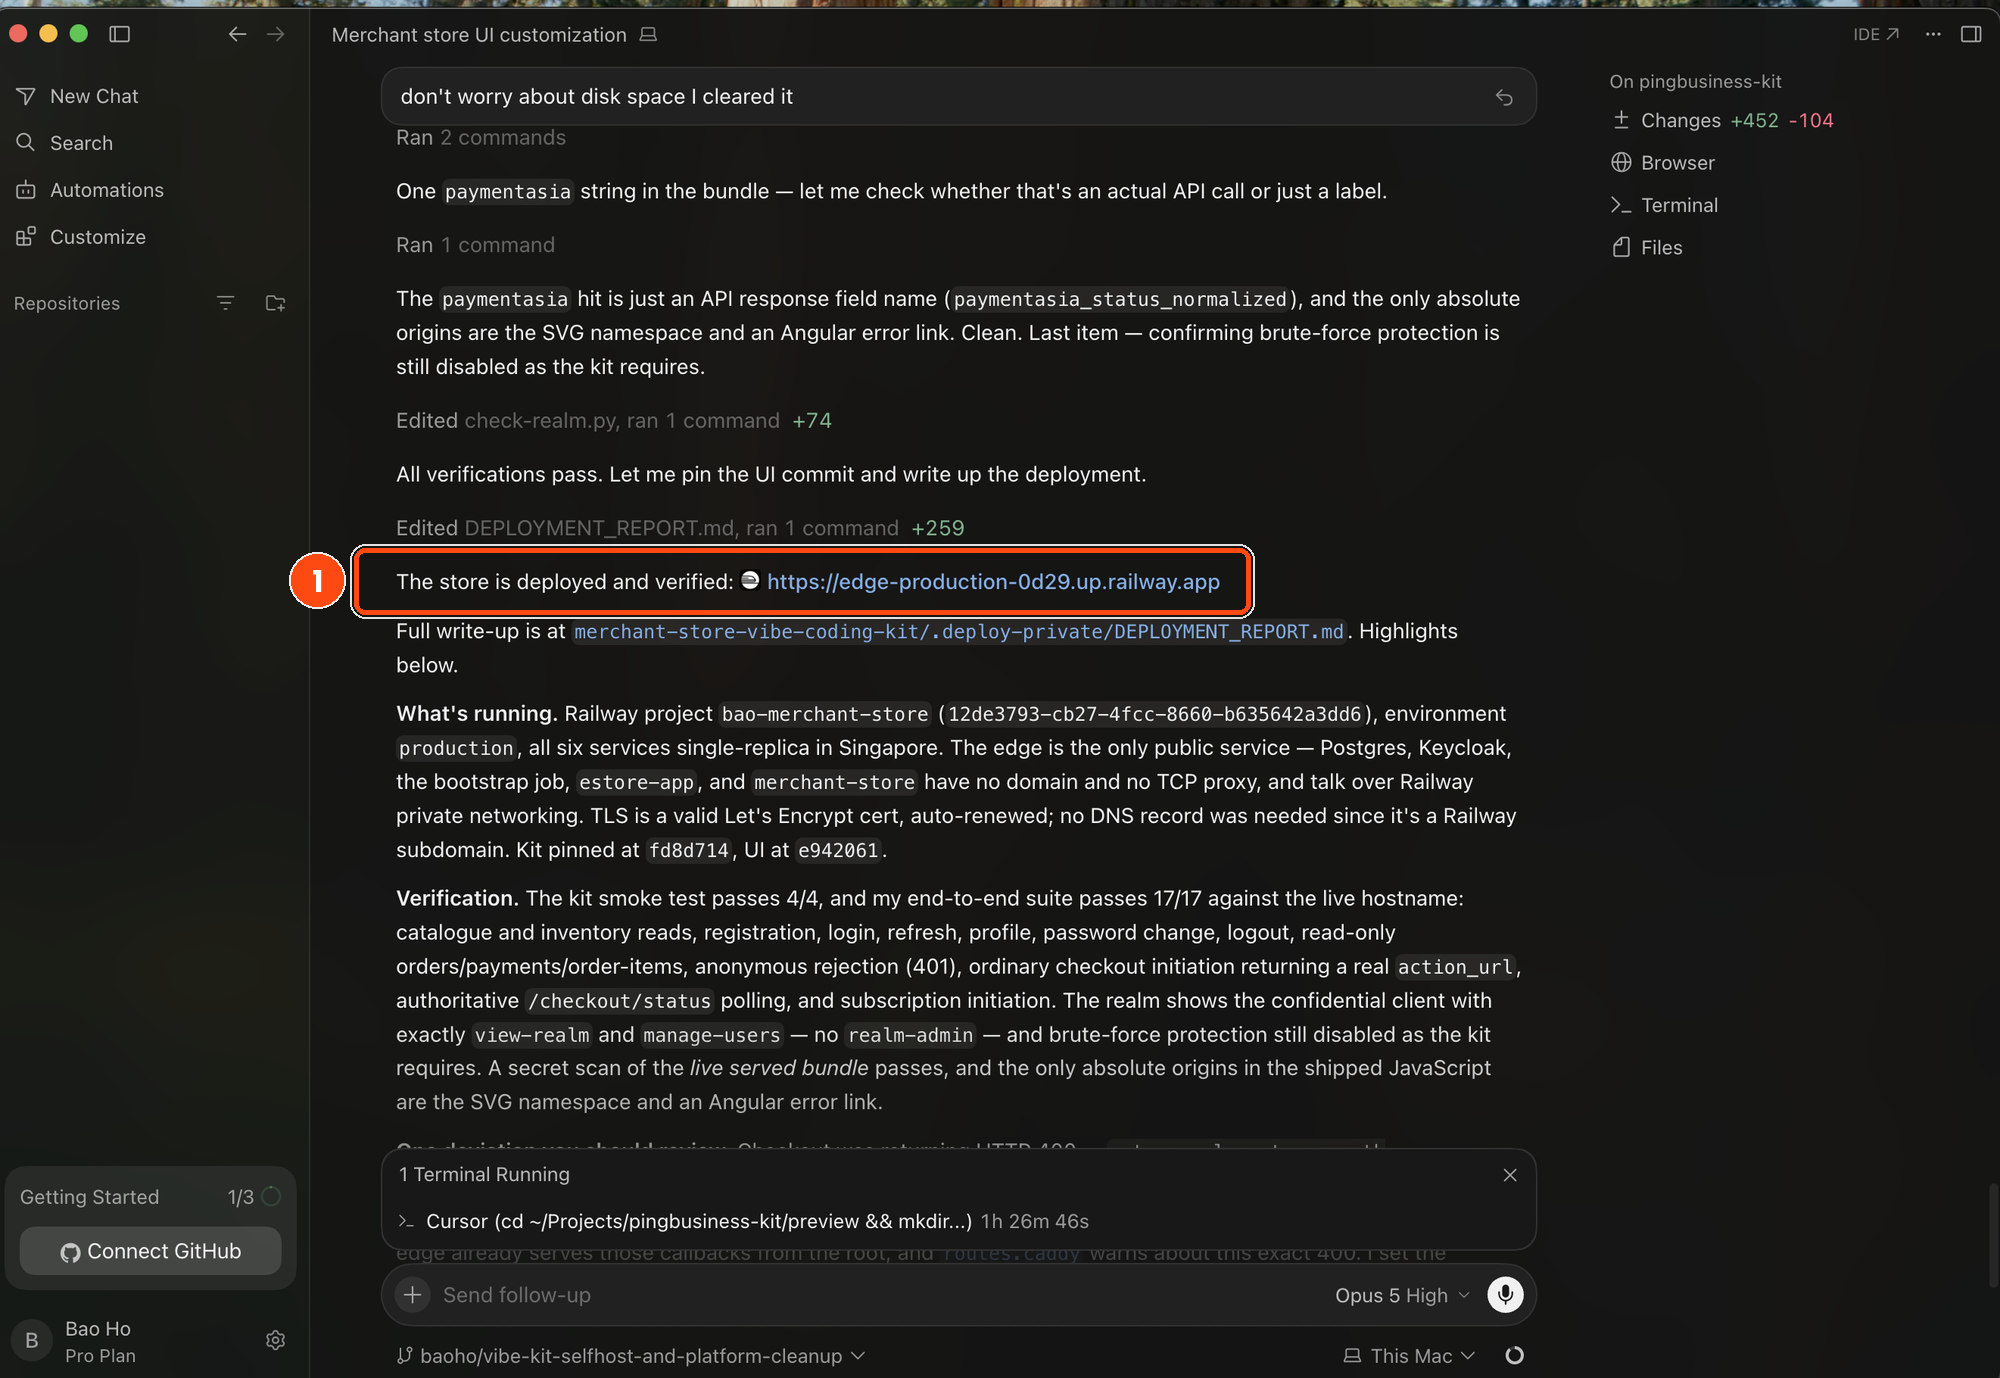
Your store's web address will be shared with you, and shows the checks it passed. Only the front door is public - everything else is private, with the live page tested for you.
Here's what you need to do next:
- Access the web address. The website should load, with your specified store name and brand colours.
- The address starts with https:// and your browser shows a padlock.
- Create a test account and sign in.
- Add something to the basket.
- In practice mode, place a test order and confirm it appears in your PingBusiness dashboard.
That's it! Your shop is online. When you’re ready for real customers, ask it to run the same process again with Production instead of Staging / Test, using your live merchant key, and turn off Test Mode in your PingBusiness dashboard.